
前言#
以前就一直对webpack等工具如何实现热更新很感兴趣,但是之前都是看的文章一知半解,所以趁现在阅读源码脑子还记得住这些东西的时候赶紧分析掉了。
另外这次的调试需要浏览器配合。
思考#
在分析前,我们来分析细化下我们的问题。
问题:是如何实现热更新/替换的?
细化问题:
- 怎么知道有文件变化的?
- 怎么去替换对应的模块的?
第二点可以再细化点,放后面再细化。
介绍#
Hot Module Replacement#
Hot Module Replacement (HMR) exchanges, adds, or removes modules while an application is running, without a full reload. This can significantly speed up development in a few ways:
- Retain application state which is lost during a full reload.
- Save valuable development time by only updating what's changed.
- Instantly update the browser when modifications are made to CSS/JS in the source code, which is almost comparable to changing styles directly in the browser's dev tools.
额,简单地说就是方便开发,不需要reload,只会替换对应需要更新的模块相关的chunk。
其实官方文档中直接就说出了它是如何工作的,有兴趣的大佬可以直接看官方文档。
Hot Module Replacement | webpackwebpack.js.org/concepts/hot-module-replacement
配置#
在我们进行分析前,我们需要先配置好热更新需要的东西。在之前的配置中加入wepback-dev-server,貌似之前的文章里已经配置了?同时新增我们的调试代码,新开一个launch.json 。package.json文件中scripts的debug入口调整为webpack-dev-server/bin/webpack-dev-server.js
  "scripts": {
    // "debug": "node --inspect-brk=3100 ./node_modules/webpack/bin/webpack.js",
    "debug": "node --inspect-brk=3100 ./node_modules/webpack-dev-server/bin/webpack-dev-server.js"
},就这么简单。当然还有其它方式,比如另起一个node server使用webpack-dev-middleware、webpack-hot-middleware。
before分析#
在分析之前,你需要了解websocket是什么东西,这个是热更新的关键技术点。
WebSocket - Web APIs | MDNdeveloper.mozilla.org/en-US/docs/Web/API/WebSocket
分析#
话不多说,直接开始分析。
入口都已经知道了,所以直接就进入到webpack-dev-server/bin/webpack-dev-server.js中。这里就不展示代码了,因为你会发现这里的代码几乎和webpack/bin/webpack.js中的一毛一样,想想也是,dev模式只是一种特殊的build模式。但这里有个地方不同,就是引入cli的时候这里多了一步preprocess。其中process.argv[1]接触过nodejs的应该都不陌生,所以不多说。 这里往里面插入了个serve的命令,很关键。
const cli = {
  ...省略
  preprocess() {
    process.argv.splice(2, 0, "serve");
  },
};

const runCli = (cli) => {
  if (cli.preprocess) {
    cli.preprocess();
  }
  ...省略
};然后进入文件流程和build相同,所以这里直接去到webpack-cli/lib/webpack-cli.js文件中
**webpack-cli/lib/webpack-cll.js**前面的文章对这个文件中做了什么已经分析过了,感兴趣的大佬可以去看一下。
你会在这里文件里找到一个很关键的词。
const WEBPACK_PACKAGE = process.env.WEBPACK_PACKAGE || "webpack";
const WEBPACK_DEV_SERVER_PACKAGE = process.env.WEBPACK_DEV_SERVER_PACKAGE || "webpack-dev-server";WEBPACK_DEV_SERVER_PACKAGE: 顾名思义,就是webpack-dev-server的包,但是现在我们还不知道它是干什么用的。
我们顺着流程,先到run方法中。
先来看下run方法拿到的数据是什么

这里的数据是不是很眼熟,是的,它就是process.argv。然后我们再往下去到loadCommandByName中,
const loadCommandByName = async (commandName, allowToInstall = false) => {

  if () {
      ...省略一堆if-else
  }else {
      const builtInExternalCommandInfo = externalBuiltInCommandsInfo.find((externalBuiltInCommandInfo) => getCommandName(externalBuiltInCommandInfo.name) === commandName ||
          (Array.isArray(externalBuiltInCommandInfo.alias)
              ? externalBuiltInCommandInfo.alias.includes(commandName)
              : externalBuiltInCommandInfo.alias === commandName));
      let pkg;
      if (builtInExternalCommandInfo) {
          ({ pkg } = builtInExternalCommandInfo);
      }
      ...省略
      let loadedCommand;
      try {
          loadedCommand = await this.tryRequireThenImport(pkg, false);
      }
      ...省略
      let command;
      try {
          command = new loadedCommand();
          await command.apply(this);
      }
      ...省略
  }
};之前分析的是build流程的,所以这里还是得看下代码
builtInExternalCommandInfo:来看下数据,这个根据指令或得到的指令配置信息,正是参数中带有的serve配对的。
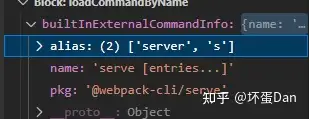
pkg自然就是@webpack-cli/serveloadCommand:这个让我们进入到@webpack-cli/lib/serve中去看下
@webpack-cli/serve#
代码有些长,所以分几块来讲。第一块,一进去就是执行webpackcli.makeCommand ,没什么好说的,参数也很眼熟,就是上边提到的buildInExternalCommandInfo,不过带上了dependencies
const WEBPACK_PACKAGE = process.env.WEBPACK_PACKAGE || "webpack";
const WEBPACK_DEV_SERVER_PACKAGE = process.env.WEBPACK_DEV_SERVER_PACKAGE || "webpack-dev-server";
class ServeCommand {
    async apply(cli) {
        await cli.makeCommand({
            name: "serve [entries...]",
            alias: ["server", "s"],
            description: "Run the webpack dev server.",
            usage: "[entries...] [options]",
            pkg: "@webpack-cli/serve",
            dependencies: [WEBPACK_PACKAGE, WEBPACK_DEV_SERVER_PACKAGE],
        }, ...省略第二个参数options, ...省略第三个参数callback)
    }
}然后我们回到makeCommand方法里
 if (commandOptions.dependencies && commandOptions.dependencies.length > 0) {
    for (const dependency of commandOptions.dependencies) {
        const isPkgExist = this.checkPackageExists(dependency);
        if (isPkgExist) {
            continue;
        }
        ...省略
    }
}俩包肯定都在,所以直接就跳过了。接着就是执行第二个参数options, 代码比较多,但实际也就一小段重要的。
async () => {
            let devServerFlags = [];
            cli.webpack = await cli.loadWebpack();
            try {
                devServerFlags = loadDevServerOptions();
            }
            ...省略
            const builtInOptions = cli.getBuiltInOptions().filter((option) => option.name !== "watch");
            return [...builtInOptions, ...devServerFlags];
}

const loadDevServerOptions = () => {
  const devServer = require(WEBPACK_DEV_SERVER_PACKAGE);
  const isNewDevServerCLIAPI = typeof devServer.schema !== "undefined";
  let options = {};
  if (isNewDevServerCLIAPI) {
      if (cli.webpack.cli && typeof cli.webpack.cli.getArguments === "function") {
          options = cli.webpack.cli.getArguments(devServer.schema);
      }
      else {
          options = devServer.cli.getArguments();
      }
  }
  else {
      options = require(`${WEBPACK_DEV_SERVER_PACKAGE}/bin/cli-flags`);
  }

  if (options.devServer) {
      return options.devServer;
  }
  return Object.keys(options).map((key) => {
      options[key].name = key;
      return options[key];
  });
};
await cli.loadWebpack:懒加载webpack,之前分析过了loadDevServerOptions:获取dev时的options。先来看下数据,依旧是让人看不懂的一堆数据。
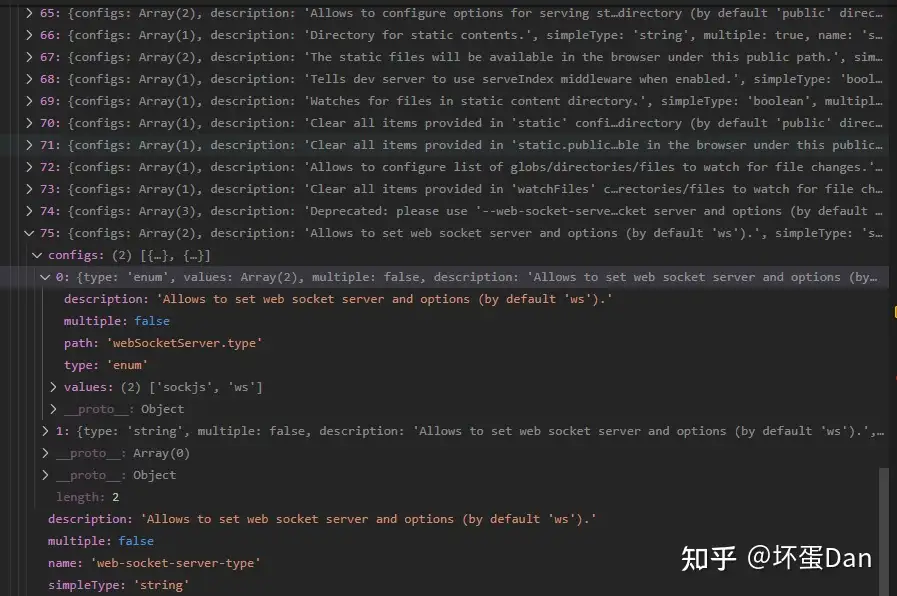
我们注意到这个loadDevServerOptions方法里执行了require(WEBPACK_DEV_SERVER_PACKAGE),所以让我们进入到webpack-dev-server/lib/Servers.js中看它做了什么。
webpack-dev-server/lib/Server.js#
需要注意的是这里并没有new,所以不会执行constructor.
const schema = require("./options.json");
class Server {
  ...省略constructor
  static get cli() {
    return {
      get getArguments() {
        return () => require("../bin/cli-flags");
      },
      get processArguments() {
        return require("../bin/process-arguments");
      },
    };
  }

  static get schema() {
    return schema;
  }
  ...省略其它
}cli:getArguments和processArguments这两个都是懒加载配置数据,只有执行时才会去获取。其中bin/cli-flags里给出的数据就是上面那一大串截图数据。而bin/process-arguments里暴露一个方法,看名字就知道是用来加工处理cli-flags里数据的,所以里面做了什么就不分析了。schema:options.json文件中,看下开头就知道是什么了。一大串的也不分析。
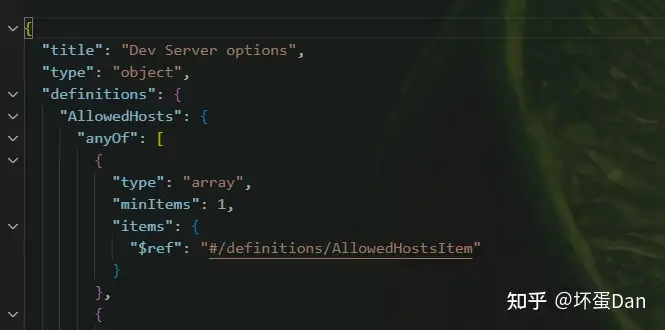
然后回到@webpack-cli/serve/index.js中的loadDevServerOptions方法中接着往下看。
if (isNewDevServerCLIAPI) {
  if (cli.webpack.cli && typeof cli.webpack.cli.getArguments === "function") {
      options = cli.webpack.cli.getArguments(devServer.schema);
  }
  else {
      options = devServer.cli.getArguments();
  }
}cli.webpack.cli:cli是webpack-cli。所以这个webpack.cli我们得进到webpack/lib/index.js中看下。
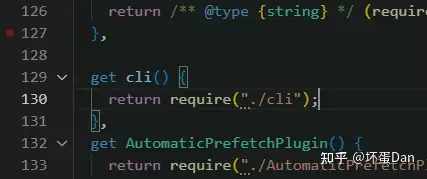
cli.webpack.cli.getArguments:这个需要结合webpack-dev-server/lib/options.json文件看,这里只展示最终的数据,依旧是一大串数据。感兴趣的大佬可以自己去看下源码,因为这一段和我们要说的流程没什么影响,所以这里就不说做了什么了,看名字就知道还是在对options.json文件数据进行格式化加工处理。 而前边提到的Server.cli.getArguments以及Server.cli.processArguments两个都是对这个webpack.cli做的兜底,如果没有就会执行Server自己的。
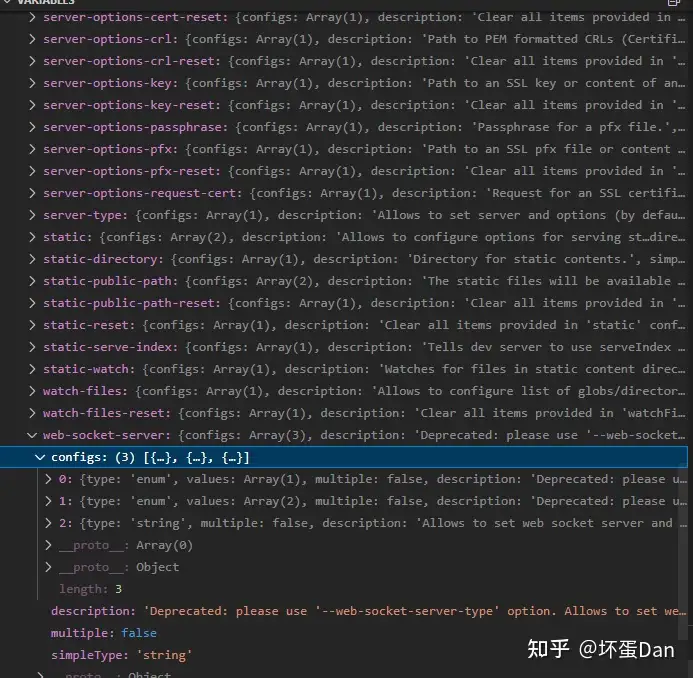
- 然后就是将这个对象转换为数组并返回。
然后回到makeCommand方法的第二个参数中接着往下看。
const builtInOptions = cli.getBuiltInOptions().filter(
  // eslint-disable-next-line @typescript-eslint/no-explicit-any
  (option) => option.name !== "watch");
  return [...builtInOptions, ...devServerFlags];
没什么好说的,就是组装数据。
执行完makeCommand第二个参数后来看下第三个参数回调,代码有些长,所以这里省略掉对options的获取加工处理以及错误场景和watch、多入口entry的场景。
async (entries, options) => {
  ...省略一堆堆options的处理
  const compiler = await cli.createCompiler(webpackCLIOptions);
  ...省略error
  const servers = [];
  ...省略watch场景
  // eslint-disable-next-line @typescript-eslint/no-var-requires
  const DevServer = require(WEBPACK_DEV_SERVER_PACKAGE);
  const isNewDevServerCLIAPI = typeof DevServer.schema !== "undefined";
  let devServerVersion;
  try {
    // eslint-disable-next-line @typescript-eslint/no-var-requires
    devServerVersion = require(`${WEBPACK_DEV_SERVER_PACKAGE}/package.json`).version;
  }
  ...省略error
  ...省略对multiCompiler的判断以及对webpack-dev-server版本的判断,这里是4.x版本
  for (const compilerForDevServer of compilersForDevServer) {
    let devServerOptions;
    if (isNewDevServerCLIAPI) {
      ...省略对几个options的处理
      const result = Object.assign({}, (compilerForDevServer.options.devServer || {}));
      ...省略数据处理以及对数据错误场景的处理
      devServerOptions = result;
    }
    else {
      ...省略无关逻辑
    }
    ...省略不是4.x版本兼容逻辑
    if (devServerOptions.port) {
      const portNumber = Number(devServerOptions.port);
      if (usedPorts.find((port) => portNumber === port)) {
        throw new Error("Unique ports must be specified for each devServer option in your webpack configuration. Alternatively, run only 1 devServer config using the --config-name flag to specify your desired config.");
      }
      usedPorts.push(portNumber);
    }
    try {
      let server;
      // TODO: remove after dropping webpack-dev-server@v3
      if (isDevServer4) {
        server = new DevServer(devServerOptions, compiler);
      }
      else {
        server = new DevServer(compiler, devServerOptions);
      }
      if (typeof server.start === "function") {
        await server.start();
      }
      else {
        // TODO remove in the next major release
        server.listen(devServerOptions.port, devServerOptions.host, (error) => {
          if (error) {
            throw error;
          }
        });
      }
      servers.push(server);
    }
    ...省略error
  }
}
await cli.createCompiler创建编译器,不多说。result这里是一个空对象devServerOptions.port为undefinednew DevServer(compiler, devServerOptions)创建server对象。这里才是重点,由于Server.js中构造函数只是对数据验证和进行一些初始化处理,所以这里就不分析了。- 然后执行
listen监听。
让我们进入到webpack-dev-server/lib/Server.js中看start中做了什么。
webpack-dev-server/lib/Server.js
async start() {
  await this.normalizeOptions();
  ...省略其它场景
    this.options.host = await Server.getHostname(
      /** @type {Host} */(this.options.host)
    );
    this.options.port = await Server.getFreePort(
      /** @type {Port} */(this.options.port),
      this.options.host
    );
  await this.initialize();
  const listenOptions = this.options.ipc
    ? { path: this.options.ipc }
    : { host: this.options.host, port: this.options.port };
  await /** @type {Promise<void>} */(
    new Promise((resolve) => {
      /** @type {import("http").Server} */
      (this.server).listen(listenOptions, () => {
        resolve();
      });
    })
  );
  ...省略
  if (this.options.webSocketServer) {
    this.createWebSocketServer();
  }
  ...省略其它场景
}
await normalizeOptions:这个里面对this.options做了很多数据处理初始化,代码快上千行了,这里就不分析了,来看下最终的数据:
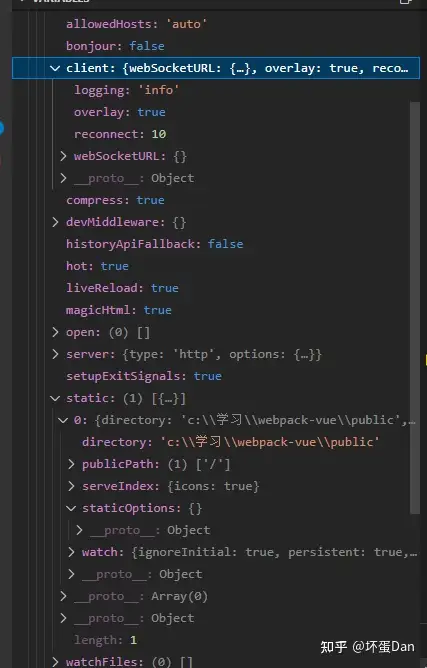
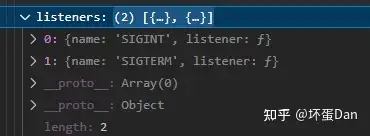
Server.getHostname: 是undefined就不都说了,里面是对local域名判断,ipv4或者ipv6。Server.getFreePort: 会去尝试监听一个free的端口三次,默认值8080。await this.initialize():我们先不分析这个方法,看着名字像是初始化Server。看下数据变化,this上多了个listeners
(this.server).listen(listenOptions,()=>{resolve();}):异步等待server监听端口,这里也先不分析listen做了什么。this.createWebSocketServer():看名字就知道是用来创建web socket server的,这里也先不分析。
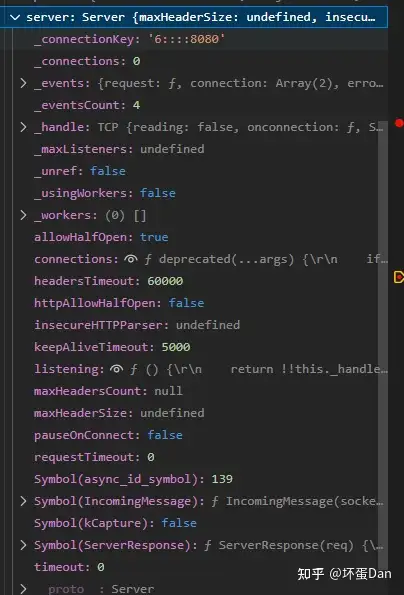
ok,我们回过头来分析initialize中做了什么。这个方法中有太多东西要分析了,我们慢慢分析。
 async initialize() {
  if (this.options.webSocketServer) {
    ...省略获取compiler
    compilers.forEach((compiler) => {
      this.addAdditionalEntries(compiler);

      const webpack = compiler.webpack || require("webpack");

      new webpack.ProvidePlugin({
        __webpack_dev_server_client__: this.getClientTransport(),
      }).apply(compiler);
      ...省略空值保护
      if (this.options.hot) {
        const HMRPluginExists = compiler.options.plugins.find(
          (p) => p.constructor === webpack.HotModuleReplacementPlugin
        );

        if (HMRPluginExists) {
          this.logger.warn(
            `"hot: true" automatically applies HMR plugin, you don't have to add it manually to your webpack configuration.`
          );
        } else {
          // Apply the HMR plugin
          const plugin = new webpack.HotModuleReplacementPlugin();

          plugin.apply(compiler);
        }
      }
    })

    if (
      this.options.client &&
      /** @type {ClientConfiguration} */ (this.options.client).progress
    ) {
      this.setupProgressPlugin();
    }
  }

  this.setupHooks();
  this.setupApp();
  this.setupHostHeaderCheck();
  this.setupDevMiddleware();
  // Should be after `webpack-dev-middleware`, otherwise other middlewares might rewrite response
  this.setupBuiltInRoutes();
  this.setupWatchFiles();
  this.setupWatchStaticFiles();
  this.setupMiddlewares();
  this.createServer();

  if (this.options.setupExitSignals) {
    const signals = ["SIGINT", "SIGTERM"];

    let needForceShutdown = false;

    signals.forEach((signal) => {
      const listener = () => {
        if (needForceShutdown) {
          process.exit();
        }

        this.logger.info(
          "Gracefully shutting down. To force exit, press ^C again. Please wait..."
        );

        needForceShutdown = true;

        this.stopCallback(() => {
          if (typeof this.compiler.close === "function") {
            this.compiler.close(() => {
              process.exit();
            });
          } else {
            process.exit();
          }
        });
      };

      this.listeners.push({ name: signal, listener });

      process.on(signal, listener);
    });
  }

  // Proxy WebSocket without the initial http request
  // https://github.com/chimurai/http-proxy-middleware#external-websocket-upgrade
  /** @type {RequestHandler[]} */
  (this.webSocketProxies).forEach((webSocketProxy) => {
    /** @type {import("http").Server} */
    (this.server).on(
      "upgrade",
      /** @type {RequestHandler & { upgrade: NonNullable<RequestHandler["upgrade"]> }} */
      (webSocketProxy).upgrade
    );
  }, this);
}addAdditionalEntries:这块代码也很长,这里省略掉一些其它无关代码,将他们省略掉之后这个方法做了什么一目了然。先是将websocket需要的一些参数组装拼接到client/index.js的require请求路径中,然后又将webpack/hot/dev-server的请求存入additionalEntrires中。最后也是最重要的,调用entryPlugin将他们存入到模块请求的hooks,这个entryPlugin上篇文章中我们分析过了,里面是一个闭包存储这个entry,然后等compiler的make这个hook被call时再执行compilation的addEntry方法,然后又去触发模块生成。既然参与打包构建,那也就说明他们的代码会被带入到浏览器中。
addAdditionalEntries(compiler) {
  const additionalEntries = [];
  ...省略对环境的判断,这里是web
  if (this.options.client && isWebTarget) {
    let webSocketURLStr = "";
    ...省略为websocket准备的一些字段参数
    additionalEntries.push(
      `${require.resolve("../client/index.js")}?${webSocketURLStr}`
    );
  }
  ...省略对options.hot值的判断
  additionalEntries.push(require.resolve("webpack/hot/dev-server"));

  const webpack = compiler.webpack || require("webpack");

  if (typeof webpack.EntryPlugin !== "undefined") {
    for (const additionalEntry of additionalEntries) {
      new webpack.EntryPlugin(compiler.context, additionalEntry, {
        // eslint-disable-next-line no-undefined
        name: undefined,
      }).apply(compiler);
    }
  }
  ...省略低版本兼容问题
}
简单的说下这两个文件做了什么
webpack-dev-server/client/index.js: 简单的说就是对参数做判断,初始化一些方法,然后创建socket.js
...省略
var socketURL = createSocketURL(parsedResourceQuery);

var onSocketMessage = {
  ...省略
  hash: function hash(_hash) {
    status.previousHash = status.currentHash;
    status.currentHash = _hash;
  },

  ok: function ok() {
    sendMessage("Ok");

    if (options.overlay) {
      hide();
    }
    reloadApp(options, status);
  },
  "content-changed": function contentChanged(file) {
    log.info("".concat(file ? "\"".concat(file, "\"") : "Content", " from static directory was changed. Reloading..."));
    self.location.reload();
  },

  "static-changed": function staticChanged(file) {
    log.info("".concat(file ? "\"".concat(file, "\"") : "Content", " from static directory was changed. Reloading..."));
    self.location.reload();
  },

  /**
   * @param {Error} error
   */
  error: function error(_error) {
    log.error(_error);
  },
  close: function close() {
    log.info("Disconnected!");

    if (options.overlay) {
      hide();
    }

    sendMessage("Close");
  }
};

socket(socketURL, onSocketMessage, options.reconnect);注意这里面的self,self.location.reload是不是很眼熟?这self可不就是window吗?但是node里是没有window的,所以这段代码其实是准备到浏览器里运行的。
来看下socket.js的代码,很短
import WebSocketClient from "./clients/WebSocketClient.js";

var Client =
typeof __webpack_dev_server_client__ !== "undefined" ? typeof __webpack_dev_server_client__.default !== "undefined" ? __webpack_dev_server_client__.default : __webpack_dev_server_client__ : WebSocketClient;

export var client = null;

var socket = function initSocket(url, handlers, reconnect) {
  client = new Client(url);
  client.onOpen(function () {
    retries = 0;

    if (typeof reconnect !== "undefined") {
      maxRetries = reconnect;
    }
  });
  client.onClose(function () {
    if (retries === 0) {
      handlers.close();
    } // Try to reconnect.


    client = null;
    ...省略retry相关

  });
  client.onMessage(function (data) {
    var message = JSON.parse(data);

    if (handlers[message.type]) {
      handlers[message.type](message.data, message.params);
    }
  });
};

export default socket;这就是个小小的socket客户端生成器。至于webSocketClient做了什么,就不说了,有兴趣的大佬可以自行看下。
看完这个我们来看下 webpack/hot/dev-server ,它的代码更短
if (module.hot) {
	var lastHash;
	var upToDate = function upToDate() {
		return lastHash.indexOf(__webpack_hash__) >= 0;
	};

	var check = function check() {
		module.hot
			.check(true)
			.then(function (updatedModules) {
				if (!updatedModules) {
					window.location.reload();
					return;
				}

				if (!upToDate()) {
					check();
				}

				if (upToDate()) {
					log("info", "[HMR] App is up to date.");
				}
			})
			.catch(function (err) {
				var status = module.hot.status();
				if (["abort", "fail"].indexOf(status) >= 0) {
					window.location.reload();
				}
			});
	};
	var hotEmitter = require("./emitter");
	hotEmitter.on("webpackHotUpdate", function (currentHash) {
		lastHash = currentHash;
		if (!upToDate() && module.hot.status() === "idle") {
			check();
		}
	});
}这个就更好理解了,等待__webpack_hash__,这个__webpack_hash__就是json文件的hash,看能否热更新,如果不行就reload。
emitter一个事件总线,发布订阅者模式。webpackHotUpdate则是监听的事件名称。currentHash就不多说了,更新的hash。module.hot.check现在暂时不知道这个是干嘛的,但是应该很重要,是一个找到热更新相关的线索,先mark下。
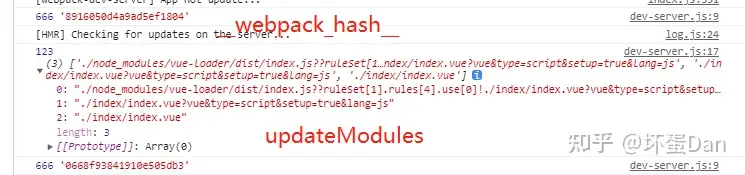
但你会发现这里仅仅只是更新log和执行reload,并没有我们想要的热更新。 但我们知道emitter只能是同一个端才能传递数据的,也就是要么都在server,要么都在clinet,所以执行emit的代码也应该和hot/dev-server在同一个端,既是client。而前面提到的webpack-dev-server/client/index.js也正好是在client的,所以让我们回到这里面去找关键代码。
果然我们发现了ok事件中有一个reloadApp的方法
var onSocketMessage = {
  ...省略
  ok: function ok() {
    sendMessage("Ok");

    if (options.overlay) {
      hide();
    }

    reloadApp(options, status);
  },
  ...省略
}; 然后我们进入到reloadApp方法中
function reloadApp(_ref, status) {
  var hot = _ref.hot

  ...省略
  var search = self.location.search.toLowerCase();
  var allowToHot = search.indexOf("webpack-dev-server-hot=false") === -1;

  if (hot && allowToHot) {
    log.info("App hot update...");
    hotEmitter.emit("webpackHotUpdate", status.currentHash);
    console.log('i am do in here') // 我们自己加上的log
    if (typeof self !== "undefined" && self.window) {
      // broadcast update to window
      self.postMessage("webpackHotUpdate".concat(status.currentHash), "*");
    }
  }
  ...省略其它场景
} 由于这段代码是注入到浏览器里的,所以打断点不太合适,这里就直接console.log(i am do in here),来看下改变文件后浏览器的log
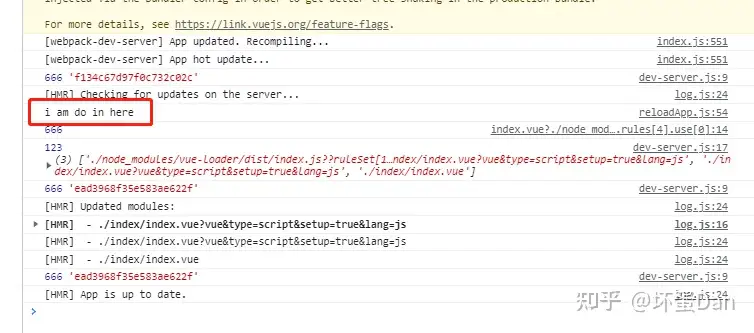
hotEmitter.emit("webpackHotUpdate", status.currentHash);这段代码也正是hot/index.js文件监听的事件,也证明了我们的猜想。
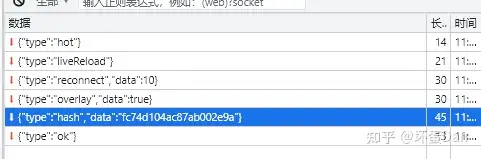
让我们回到ok事件,client接收到了server端 的ok事件触发上边提到的。至于这个事件是从哪里触发的,我们等会就会提到。而这里也没有我们想要的东西,我们是想知道如何请求的,顺着这点我们推测出需要拿到hash,然后请求对应hash相关的东西,但是这里都没有,说明还有别的代码被注入到浏览器中了(上边留下的线索module.hot.check),先不纠结,我们接着往下看。顺便看下实际上通过socket拿到的数据。
- 接着回到
initialize中,我们来看下这个ProvidePlugin
      new webpack.ProvidePlugin({
        __webpack_dev_server_client__: this.getClientTransport(),
}).apply(compiler);看下官方对这个plugin的解释[2]

自动引入模块,不需要用到import或者require,相当于存储在全局变量中,这样打包后的bundle也能使用。盲猜一下,应该是基于Object.defineProperty在get的时候进行require 。
然而并不是。。。但这不影响我们的流程,我们就不分析了,知道他能干嘛即可。
getClientTransport方法判断当前的传输方式是socket还是websocket,然后匹配对应的文件

我们接着往下看
        if (this.options.hot) {
          const HMRPluginExists = compiler.options.plugins.find(
            (p) => p.constructor === webpack.HotModuleReplacementPlugin
          );

          if (HMRPluginExists) {
            this.logger.warn(
              `"hot: true" automatically applies HMR plugin, you don't have to add it manually to your webpack configuration.`
            );
          } else {
            // Apply the HMR plugin
            const plugin = new webpack.HotModuleReplacementPlugin();

            plugin.apply(compiler);
}如果你配置了module.hot = true,那么就没必要再自行配置**HotModuleReplacementPlugin** ,如果没有这里直接new一个**HotModuleReplacementPlugin**出来。
然后我们先绕过这一段往下看先,因为这个插件非常重要,这里一时半会说不清楚。
setupHooks:
setupHooks() {
  ...省略invalid
  this.compiler.hooks.done.tap(
    "webpack-dev-server",
    (stats) => {
      if (this.webSocketServer) {
        this.sendStats(this.webSocketServer.clients, this.getStats(stats));
      }
      this.stats = stats;
    }
  );
}
sendStats(clients, stats, force) {
  ...省略shouldEmit场景
  this.currentHash = stats.hash;
  this.sendMessage(clients, "hash", stats.hash);
  ...省略error、warning场景
  this.sendMessage(clients, "ok");
}
sendMessage(clients, type, data, params) {
  for (const client of clients) {
    if (client.readyState === 1) {
      client.send(JSON.stringify({ type, data, params }));
    }
  }
}
getStats(statsObj) {
  const stats = Server.DEFAULT_STATS;
  ...省略warning
  return statsObj.toJson(stats);
}代码应该很好理解,监听done的hook,在done被触发时发送数据。是的,联想到上面的websocket client,这里就是触发ok事件的地方,也就是server。来看下sendMessage发送的数据
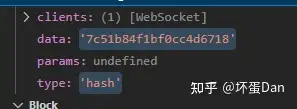
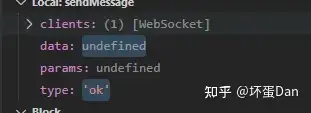
而这里的type正好就是上边client里的监听事件名。
setupApp: 起一个express服务 [3]
  setupApp() {
    this.app = new /** @type {any} */ (express)();
} setupHostHeaderCheck: 对请求的header做判断。setupDevMiddleware: 肉眼可见的重要,webpack-dev-middleware
  setupDevMiddleware() {
    const webpackDevMiddleware = require("webpack-dev-middleware");
    this.middleware = webpackDevMiddleware(
      this.compiler,
      this.options.devMiddleware
    );
} 先来看下官方的描述:[4]
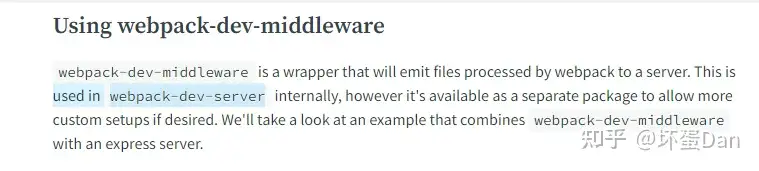
看第一句就行, 其实就是一个中间件。将来自wepback处理后的bundle传给服务器。也就是app, express。
这里部分代码涉及到runtime了,所以无法在编译的过程中就执行,需要等待编译完成后再改动任意参与打包的文件之后才会触发runtime的断点。
function wdm(compiler, options = {}) {
  ...省略
  const context = {
    state: false,
    stats: undefined,
    callbacks: [],
    options,
    compiler,
    watching: undefined,
    logger: compiler.getInfrastructureLogger("webpack-dev-middleware"),
    outputFileSystem: undefined
  };
  setupHooks(context);
  ...省略
  setupOutputFileSystem(context); // Start watching
  ...省略watching = true 和 multiCompiler的场景

  watchOptions = context.compiler.options.watchOptions || {};
  context.watching = context.compiler.watch(watchOptions, errorHandler);

  const instance = middleware(context); // API

  instance.getFilenameFromUrl = url => getFilenameFromUrl(context, url);


  instance.waitUntilValid = (callback = noop) => {
    ready(context, callback);
  };

  instance.invalidate = (callback = noop) => {
    ready(context, callback);
    context.watching.invalidate();
  };

  instance.close = (callback = noop) => {
    context.watching.close(callback);
  };

  instance.context = context;
  return instance;
} setupHooks: 省略了一大堆代码后一目了然,就是监听compiler.done这个hook,在触发后去调用callback
function setupHooks(context) {
  ...省略
  function done(stats) {
    context.state = true;
    context.stats = stats;
    process.nextTick(() => {
      const {
        ...省略部分参数
        state,
        callbacks
      } = context;
      if (!state) {
        return;
      }
      ...省略multiCompiler场景
      statsOptions = compiler.options.stats
      ...省略
      context.callbacks = [];
      callbacks.forEach(callback => {
          callback(stats);
        });
    });
  }
  ...省略监听error场景
  context.compiler.hooks.done.tap("webpack-dev-middleware", done);
}setupOutputFileSystem(context): 这段很明显能看出来是在重写compiler的outputFileSystem,之前的文章中有提到过这个outputFileSystem和inputFileSystem,都是基于fs模块封装的一些方法,主要是将执行过的内容进行缓存处理。memfs[5] : 全称为memory-file-system,替换后,编译完的bundle就不再是以文件的形式表现出来了,而是以对象的形式缓存在内存中,这样读取会比读取文件快。
function setupOutputFileSystem(context) {
  let outputFileSystem;

  ...省略自带outputFileSystem场景
  outputFileSystem = memfs.createFsFromVolume(new memfs.Volume()); // TODO: remove when we drop webpack@4 support
  outputFileSystem.join = path.join.bind(path);
  const compilers = context.compiler.compilers || [context.compiler];

  for (const compiler of compilers) {
    compiler.outputFileSystem = outputFileSystem;
  }
  context.outputFileSystem = outputFileSystem;
}
context.compiler.watch(watchOptions, errorHandler);: 回到webpack-dev-middleware/dist/index.js中,替换了compiler的outputFileSystem之后执行compiler的watch方法。
watch(watchOptions, handler) {
  if (this.running) {
    return handler(new ConcurrentCompilationError());
  }

  this.running = true;
  this.watchMode = true;
  this.watching = new Watching(this, watchOptions, handler);
  return this.watching;
} 如果是第一次执行watch方法会new Watching实例,注意下这个this.watching,和webpack-dev-middleware里的this.compiler.watching对应,所以第二次执行时这个watching就不再是undefinded,也就不会再new Watching 。
new Watch就不分析代码了,简单的说下发生了什么 ,代码太多也太绕了。算了,还是得看一小段代码,里面省略了一些场景和一堆error、logger。
_go(fileTimeInfoEntries, contextTimeInfoEntries, changedFiles, removedFiles) {
  ...省略error和logger
  this.compiler.hooks.watchRun.callAsync(this.compiler, err => {
    const onCompiled = (err, compilation) => {
      process.nextTick(() => {
        this.compiler.emitAssets(compilation, err => {
          this.compiler.emitRecords(err => {
            return this._done(null, compilation);
          });
        });
      });
    };
    this.compiler.compile(onCompiled);
  });
};watchRun: [6] 在mode为watch(即监听模式)前提下,在compilation创建后但还没run的时候执行。compiler.emitAssets: 简单的说就是在assets(即编译完后的sources)生成文件的时候,回调触发时间是在compiler.assetsEmitted[7]这个hook被触发后 。这里还得补充一小段代码,不然有些难懂。
emitAssets(compilation, callback) {
    asyncLib.forEachLimit(
      assets,
      15,
      ({ name: file, source, info }, callback) => {
          ...省略
            this.outputFileSystem.writeFile(targetPath, content, err => {
              this.hooks.assetEmitted.callAsync(
                file,
                {
                  content,
                  source,
                  outputPath,
                  compilation,
                  targetPath
                },
                callback
              );

          ...省略
      }
    );
};里面做了一堆的缓存和对缓存文件的判断等,这里全部都省略了,就是想突出一段代码this.outputFileSystem.writeFile,前面我们提到过compiler.outputFileSystem被替换成memfs,也就是生成文件变成生成缓存在内存的虚拟”文件“,因此这也就是为什么你开发模式下看不到dist打包后的文件。 然后callback既是new Watching里传过来的。
回到new Watching中
emitRecords: 不多说,官方文档里居然没这个hook的说明。_done:
_done(err, compilation) {
  this.running = false;
  ...省略logger
  let stats = null;
  ...省略error
  if (compilation) {
    ...省略
    stats = new Stats(compilation);
  }

  const cbs = this.callbacks;
  this.callbacks = [];
  this.compiler.hooks.done.callAsync(stats, err => {
    ...省略
    this.compiler.cache.storeBuildDependencies(
      compilation.buildDependencies,
      ...省略error
      process.nextTick(() => {
	if (!this.closed) {
		this.watch(
			compilation.fileDependencies,
			compilation.contextDependencies,
			compilation.missingDependencies
		);
	}
    );
  });
}这个方法没什么好说的,重点就在于触发了done这个hook。 但需要注意这里的this.watch方法,来看一小段这个watch方法的代码
watch(files, dirs, missing) {
  this.pausedWatcher = null;
  this.watcher = this.compiler.watchFileSystem.watch(
    files,
    dirs,
    missing,
    this.lastWatcherStartTime,
    this.watchOptions,
    ...省略callback
  );
} 这里很明显能看到compiler.watchFileSystem.watch(....),这就是监听文件变化的地方,所以我们第一个问题就有着落了。
stats:
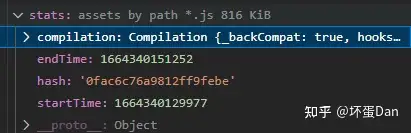
为什么要特意说done这个hook呢,因为这个hook前面也有提到过,提到过某个方法对它进行了监听。是的,就是webpack-dev-middleware的setupHook以及webpack-dev-server/lib/Server.js的initialize方法的setupHook ,而这两个方法传入的回调里拿到的数据就是上面这个stats。 webpack-dev-middleware里的setupHook 里是去执行context.callbacks,但由于这里是空数组,所以就不分析了。然后我们回到webpack-dev-server/lib/Server.js的setupHooks,在done时发送数据,那么发送给谁呢?websocketServer.client,也就是上边提到的webpack-dev-server/client/index.js以及webpack/hot/dev-server.js这两段植入到浏览器的代码,也就是websocket的客户端。
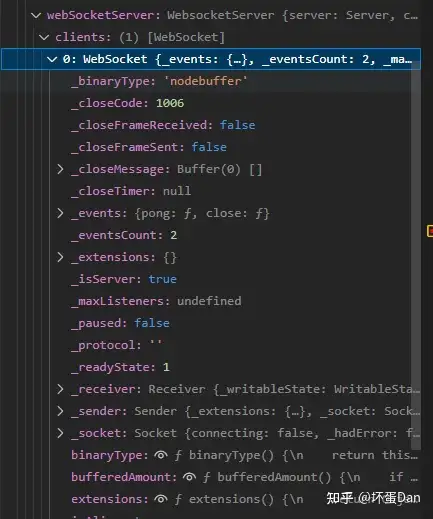
接着我们回到webpack-dev-server/dist/index.js中,还没分析完呢。。。
const instance = middleware(context),进入到middleware.js中看下做了什么,看名字就知道是一个中间件,代码较长,也不太好省略,我们来一点一点分析。
 function wrapper(context) {
  return async function middleware(req, res, next) {
    res.locals = res.locals || {};
    ...省略非GET POST请求的场景
    ready(context, processRequest, req);

    async function goNext() {
      if (!context.options.serverSideRender) {
        return next();
      }

      return new Promise(resolve => {
        ready(context, () => {
          res.locals.webpack = {
            devMiddleware: context
          };
          resolve(next());
        }, req);
      });
    }

    async function processRequest() {
      const filename = getFilenameFromUrl(context, req.url);

      if (!filename) {
        await goNext();
        return;
      }
      ...省略header !== undefined 的场景

      if (!getHeaderFromResponse(res, "Content-Type")) {
        const contentType = mime.contentType(path.extname(filename));
        if (contentType) {
          setHeaderForResponse(res, "Content-Type", contentType);
        }
      }

      if (!getHeaderFromResponse(res, "Accept-Ranges")) {
        setHeaderForResponse(res, "Accept-Ranges", "bytes");
      }

      ...省略undefined场景
      const isFsSupportsStream = typeof context.outputFileSystem.createReadStream === "function";
      let bufferOtStream;
      let byteLength;

      try {
        if (typeof start !== "undefined" && typeof end !== "undefined" && isFsSupportsStream) {
          bufferOtStream =
            /** @type {import("fs").createReadStream} */
            context.outputFileSystem.createReadStream(filename, {
              start,
              end
            });
          byteLength = end - start + 1;
        } else {
          bufferOtStream =
            /** @type {import("fs").readFileSync} */
            context.outputFileSystem.readFileSync(filename);
          ({
            byteLength
          } = bufferOtStream);
        }
      }
      ...省略error

      send(req, res, bufferOtStream, byteLength);
    }
  };
}先是看到req、res、next是不是就有express server middleware那味了 ,先来看下req数据,
但是数据太长了,所以只看我们想看的东西
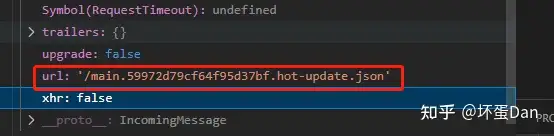
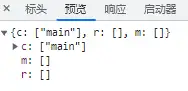
如果你在开发的时候有研究过热更新是怎么请求的话你在浏览器端应该就会发现有一段请求了一个json文件和一个js文件 ,并且你会发现这个json文件名字中间的一段hash和js文件的hash是一样的,然后你再点开这个文件的预览你会发现你修改的代码赫然就在这里面。
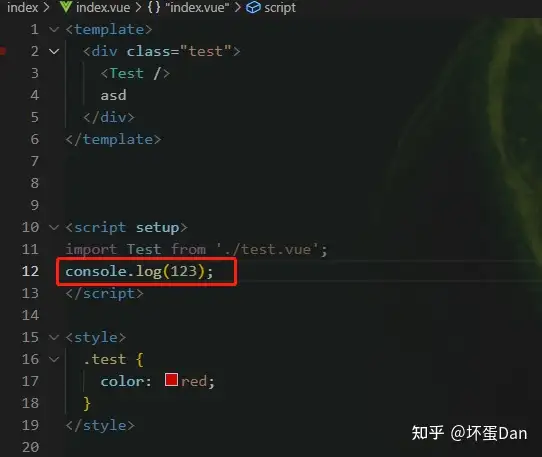
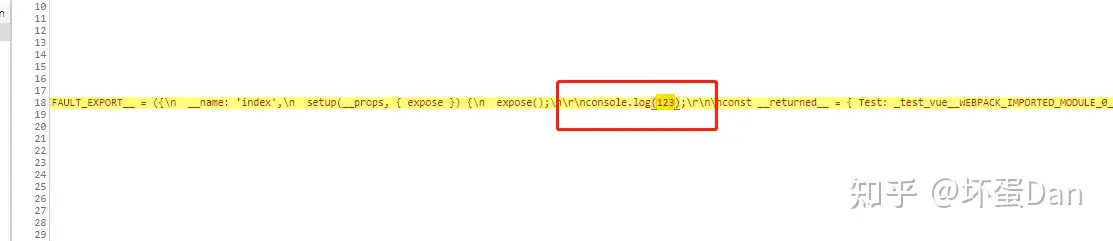
请求的代码
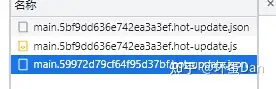
为什么会是这样呢?我们后面再说。现在先回到middleware代码中
ready(context, processRequest, req),这里直接就ready了,如果没ready,processRequest就会被放到上面提到的webpack-dev-middleware的setupHooks里的context.callbacks中,等待done的时候再执行。filename

setHeaderForResponse(res, "Content-Type", contentType);: 设置响应的请求头setHeaderForResponse(res, "Accept-Ranges", "bytes");同理bufferOtStream = context.outputFileSystem.createReadStream(filename, { start, end });看方法名字就知道这是获取了文件的buffer,但是这里由于start、end都是undefinded,所以这里走的是bufferOtStream = context.outputFileSystem.readFileSync(filename)send(req, res, bufferOtStream, byteLength):
function send(req, res, bufferOtStream, byteLength) {
  if (typeof bufferOtStream.pipe === "function") {
    setHeaderForResponse(res, "Content-Length", byteLength);

    if (req.method === "HEAD") {
      res.end();
      return;
    }
    bufferOtStream.pipe(res);
    return;
  }

  if (typeof res.send === "function") {
    res.send(bufferOtStream);
    return;
  }

  res.setHeader("Content-Length", byteLength);

  if (req.method === "HEAD") {
    res.end();
  } else {
    res.end(bufferOtStream);
  }
}一目了然,调用res.send传递数据。那么这里就说完了,回到webpack-dev-middleware中return instance;
总结一下webpack-dev-middleware做了什么
\1. setupHooks: 监听compiler.done的hook, 如果这个时候如果callbacks不为空就执行。而里面的callback则是来自middleware里的ready的next()。也就是需要异步执行的中间件。
\2. setupOutputFileSystem:重写compiler的outputFileSystem,将存储为文件的形式变为以对象的形式缓存到内存中,提高读取速度。
\3. context.compiler.watch:如果没有创建过watching实例则会new一个,然后执行compiler.compile方法, 在compiler触发finishMake的hook之后,等到compilation.seal执行回调后再执行这个emitAssets方法,将assets即打包编译后的模块写入内存中。 然后在compiler触发emitRecords的hook时去触发_done方法,这个方法中获取了模块的hash等数据,而这个hash是和浏览器请求拿到的hash是一致的。然后触发了compiler.done的hook,随后触发setupHooks里的callbacks执行,以及这个之外webpack-dev-server的sendStat。同时在里面调用compiler.watchFileSystem.watch对文件进行监听。
\4. 创建一个middleware中间件实例,对请求内容进行拦截并返回请求文件的buffer 。
\5. 返回实例对象给webpack-dev-server的this.middleware
这么一看,这个webpack-dev-middleware其实就是一个中间件,dev-server通过它获取webpack中编译的数据并且将这些数据写入内存,然后返回。
然后返回到webpack-dev-server/lib/Server.js中的initialize方法中
setupBuiltInRoutes: 看代码就知道这个几个路由,但是暂时不知道是干嘛的,先放着。
setupBuiltInRoutes() {
  const { app, middleware } = this;
  (app).get(
    "/__webpack_dev_server__/sockjs.bundle.js",
    (req, res) => {
      res.setHeader("Content-Type", "application/javascript");
      const clientPath = path.join(__dirname, "..", "client");
      res.sendFile(path.join(clientPath, "modules/sockjs-client/index.js"));
    }
  );
  (app).get(
    "/webpack-dev-server/invalidate",
    (_req, res) => {
      this.invalidate();
      res.end();
    }
  );
  (app).get(
    "/webpack-dev-server",
    (req, res) => {
      (middleware).waitUntilValid((stats) => {
        res.setHeader("Content-Type", "text/html");
        res.write(
          '<!DOCTYPE html><html><head><meta charset="utf-8"/></head><body>'
        );

        const statsForPrint =
          typeof ((stats).stats) !== "undefined"
            ? (stats).toJson().children
            : [(stats).toJson()];

        res.write(`<h1>Assets Report:</h1>`);

        (statsForPrint).forEach((item, index) => {
          res.write("<div>");

          const name =
            typeof item.name !== "undefined"
              ? item.name
              : (stats).stats
              ? `unnamed[${index}]`
              : "unnamed";

          res.write(`<h2>Compilation: ${name}</h2>`);
          res.write("<ul>");

          const publicPath =
            item.publicPath === "auto" ? "" : item.publicPath;

          for (const asset of (
            item.assets
          )) {
            const assetName = asset.name;
            const assetURL = `${publicPath}${assetName}`;

            res.write(
              `<li>
            <strong><a href="${assetURL}" target="_blank">${assetName}</a></strong>
          </li>`
            );
          }
          res.write("</ul>");
          res.write("</div>");
        });
        res.end("</body></html>");
      });
    }
  );
} setupWatchFiles: 和自定义监听文件有关,这边没有配置,所以直接绕过了。
  setupWatchFiles() {
    const { watchFiles } = this.options;

    if (/** @type {WatchFiles[]} */ (watchFiles).length > 0) {
      /** @type {WatchFiles[]} */
      (watchFiles).forEach((item) => {
        this.watchFiles(item.paths, item.options);
      });
    }
}setupWatchStaticFiles: 我们这里有一个静态路径,但实际上我并没有在配置文件中配置static字段,应该是htmlWebpackPlugin配置导致的。
setupWatchStaticFiles() {
  if ((this.options.static).length > 0) {
    (this.options.static).forEach((staticOption) => {
      if (staticOption.watch) {
        this.watchFiles(staticOption.directory, staticOption.watch);
      }
    });
  }

}

watchFiles(watchPath, watchOptions) {
  const chokidar = require("chokidar");
  const watcher = chokidar.watch(watchPath, watchOptions);

  if (this.options.liveReload) {
    watcher.on("change", (item) => {
      if (this.webSocketServer) {
        this.sendMessage(
          this.webSocketServer.clients,
          "static-changed",
          item
        );
      }
    });
  }

  this.staticWatchers.push(watcher);
} 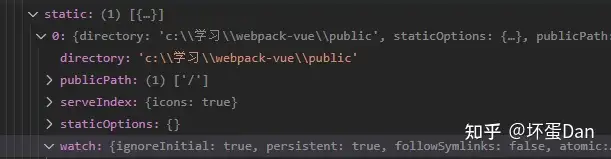
chokidar:一个高效的跨平台文件查看器[8]item: 静态文件的绝对路径
然后回到webpack-dev-server/lib/Server.js中的inititalize方法
setupMiddlewares: 代码又是很长,大部分都没法子省略,只能是一点一点分析了。
setupMiddlewares() {
  let middlewares = [];

  // compress is placed last and uses unshift so that it will be the first middleware used
  if (this.options.compress) {
    const compression = require("compression");

    middlewares.push({ name: "compression", middleware: compression() });
  }
  ...省略undefined场景

  {
    const optionsRequestResponseMiddleware = (req, res, next) => {
      if (req.method === "OPTIONS") {
        res.statusCode = 204;
        res.setHeader("Content-Length", "0");
        res.end();
        return;
      }
      next();
    };

    middlewares.push({
      name: "options-middleware",
      path: "*",
      middleware: optionsRequestResponseMiddleware,
    });
  }

  middlewares.push({
    name: "webpack-dev-middleware",
    middleware:
      /** @type {import("webpack-dev-middleware").Middleware<Request, Response>}*/
      (this.middleware),
  });

  ...省略undefined场景

  if ((this.options.static).length > 0) {
    (this.options.static).forEach((staticOption) => {
      staticOption.publicPath.forEach((publicPath) => {
        middlewares.push({
          name: "express-static",
          path: publicPath,
          middleware: express.static(
            staticOption.directory,
            staticOption.staticOptions
          ),
        });
      });
    });
  }
  ...省略undefined场景

  if ((this.options.static).length > 0) {
    const serveIndex = require("serve-index");
    (this.options.static).forEach((staticOption) => {
      staticOption.publicPath.forEach((publicPath) => {
        if (staticOption.serveIndex) {
          middlewares.push({
            name: "serve-index",
            path: publicPath,
            middleware: (req, res, next) => {
              // serve-index doesn't fallthrough non-get/head request to next middleware
              if (req.method !== "GET" && req.method !== "HEAD") {
                return next();
              }
              serveIndex(
                staticOption.directory,
                (staticOption.serveIndex)
              )(req, res, next);
            },
          });
        }
      });
    });
  }

  if (this.options.magicHtml) {
    middlewares.push({
      name: "serve-magic-html",
      middleware: this.serveMagicHtml.bind(this),
    });
  }
  ...省略undefined场景

  middlewares.forEach((middleware) => {
    if (typeof middleware === "function") {
      (this.app).use(middleware);
    } else if (typeof middleware.path !== "undefined") {
      (this.app).use(middleware.path, middleware.middleware);
    } else {
      (this.app).use(middleware.middleware);
    }
  });
  ...省略undefined场景
}compression:一个nodejs压缩的中间件[9] 。代码就不分析了,知道它是干嘛的就行。会根据传入的options将res的body压缩处理。

optionsRequestResponseMiddleware如果请求method是options就直接结束。express.static: 说人话就是帮你通过这里配置的静态资源路径帮你找到静态文件。

serve-index: 一个express的中间件,可以将你文件夹中的文件列表展示在浏览器中。[10] 看着是不是很眼熟?如果你用过vscode的live server插件的话。serveMagicHtml:很好懂,就是把你的请求的js文件1以html的格式返回给浏览器。
serveMagicHtml(req, res, next) {
  ...省略error
  (this.middleware).waitUntilValid(() => {
    const _path = req.path;
    try {
      const filename = (this.middleware).getFilenameFromUrl(`${_path}.js`);
      const isFile = ((this.middleware).context.outputFileSystem).statSync((filename)).isFile();
      if (!isFile) {
        return next();
      }
      const queries = req._parsedUrl.search || "";
      const responsePage = `<!DOCTYPE html><html><head><meta charset="utf-8"/></head><body><script type="text/javascript" charset="utf-8" src="${_path}.js${queries}"></script></body></html>`;

      res.send(responsePage);
    } catch (error) {
      return next();
    }
  });
} middlewares: 最后一段就是在注册中间件了,不多说,来看下数据。
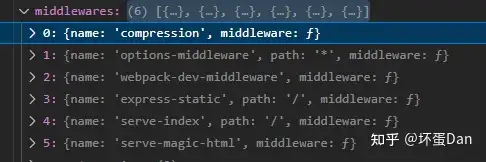
所以这个方法是在根据options匹配中间件,然后注册。
接着再回到inintialize方法中。
createServer: 这个方法做了什么一目了然,用过websocket应该不会陌生,创建scoket的server端,然后监听close广播,如果接收到了就注销自己。 另外这里的type是http。
createServer() {
  const { type, options } = this.options.server

  this.server = require(type).createServer(
    options,
    this.app
  );

  (this.server).on(
    "connection",
    (socket) => {
      this.sockets.push(socket);
      socket.once("close", () => {
        this.sockets.splice(this.sockets.indexOf(socket), 1);
      });
    }
  );
  ...省略监听error
}然后继续回到initialize方法中。终于只剩下最后一段了
 if (this.options.setupExitSignals) {
  const signals = ["SIGINT", "SIGTERM"];

  let needForceShutdown = false;

  signals.forEach((signal) => {
    const listener = () => {
      if (needForceShutdown) {
        process.exit();
      }

      needForceShutdown = true;

      this.stopCallback(() => {
        if (typeof this.compiler.close === "function") {
          this.compiler.close(() => {
            process.exit();
          });
        } else {
          process.exit();
        }
      });
    };

    this.listeners.push({ name: signal, listener });

    process.on(signal, listener);
  });
}process.on监听进程SIGINT: 程序终止的标识,一般就是你CTRL(唱跳Rap篮球)+C(蔡徐坤)SIGTERM: 程序结束的标识process.exit: 不多说,直接退出代码停止运行。
ok,那我们就说完这个方法了 ,不对,好像忘了点东西。哦,是HotModuleReplacementPlugin
HotModuleReplacementPlugin
这块的代码过长,但是又很重要,所以这里一小段一小段展示或者简单描述做了什么。从流程上来说他也应该在这里。
apply(compiler) {
    ...省略
    compiler.hooks.compilation.tap("HotModuleReplacementPlugin", (compilation, { normalModuleFactory }) => {...})
    ...省略
}整体的框架就是这个compilation.tap [11]
//#region module.hot.* API
compilation.dependencyFactories.set(
  ModuleHotAcceptDependency,
  normalModuleFactory
);
compilation.dependencyTemplates.set(
  ModuleHotAcceptDependency,
  new ModuleHotAcceptDependency.Template()
);
compilation.dependencyFactories.set(
  ModuleHotDeclineDependency,
  normalModuleFactory
);
compilation.dependencyTemplates.set(
  ModuleHotDeclineDependency,
  new ModuleHotDeclineDependency.Template()
);
//#endregion

//#region import.meta.webpackHot.* API
compilation.dependencyFactories.set(
  ImportMetaHotAcceptDependency,
  normalModuleFactory
);
compilation.dependencyTemplates.set(
  ImportMetaHotAcceptDependency,
  new ImportMetaHotAcceptDependency.Template()
);
compilation.dependencyFactories.set(
  ImportMetaHotDeclineDependency,
  normalModuleFactory
);
compilation.dependencyTemplates.set(
  ImportMetaHotDeclineDependency,
  new ImportMetaHotDeclineDependency.Template()
);
//#endregion
这一大段让人看了就头疼, 一堆dependency都不知道是干什么用的,看着像是给module.hot和import.meta.webpackHot的api引入相关的依赖和模板,姑且先绕过往下看。但需要留一下这个module.hot,我们前面将clinet的代码时不是使用到了module.hot.check方法吗?很有可能就在这里面。
compilation.hooks.record.tap(...)
compilation.hooks.fullHash.tap(...)
compilation.hooks.processAssets(...)
compilation.hooks.additionalTreeRuntimeRequirements(...)接着便是四连hook,把人都整懵圈了
record: [12] 只有``shouldRecord是true时才执行,用来存储compilation的信息,到时更新后可以用作新旧diff`,里面做了什么咱就不多说了。fullHash: 官方文档中没找到这个hook相关的描述,但是应该是在fullHash生成时执行。processAssets:[13] 在生成所有代码后调用这个hook,比如如果需要对代码进行压缩等,之前貌似是在emit的hook中执行。additionalTreeRuntimeRequirements:官方文档里也没给出这个hook的描述。。。。借用了别的大佬描述:在seal阶段,所有模块的代码生成之后,会调用additionalTreeRuntimeRequirements钩子,用于添加模块在代码生成时需要的runtime代码。如果使用到了热更新功能,那么会添加热更新相关的runtime代码。
我们来简单的分析下这三个hook里做了什么。
先来看下fullHash的hook
let hotIndex = 0;
const fullHashChunkModuleHashes = {};
const chunkModuleHashes = {};
const updatedModules = new TupleSet();
const fullHashModules = new TupleSet();
const nonCodeGeneratedModules = new TupleSet();
compilation.hooks.fullHash.tap("HotModuleReplacementPlugin", hash => {
  const chunkGraph = compilation.chunkGraph;
  const records = compilation.records;
  for (const chunk of compilation.chunks) {
    const getModuleHash = module => {
      if (
        compilation.codeGenerationResults.has(module, chunk.runtime)
      ) {
        return compilation.codeGenerationResults.getHash(
          module,
          chunk.runtime
        );
      } else {
        nonCodeGeneratedModules.add(module, chunk.runtime);
        return chunkGraph.getModuleHash(module, chunk.runtime);
      }
    };
    const fullHashModulesInThisChunk =
      chunkGraph.getChunkFullHashModulesSet(chunk);
    if (fullHashModulesInThisChunk !== undefined) {
      for (const module of fullHashModulesInThisChunk) {
        fullHashModules.add(module, chunk);
      }
    }
    const modules = chunkGraph.getChunkModulesIterable(chunk);
    if (modules !== undefined) {
      if (records.chunkModuleHashes) {
        if (fullHashModulesInThisChunk !== undefined) {
          for (const module of modules) {
            const key = `${chunk.id}|${module.identifier()}`;
            const hash = getModuleHash(module);
            if (
              fullHashModulesInThisChunk.has(/** @type {RuntimeModule} */(module))
            ) {
              if (records.fullHashChunkModuleHashes[key] !== hash) {
                updatedModules.add(module, chunk);
              }
              fullHashChunkModuleHashes[key] = hash;
            } else {
              if (records.chunkModuleHashes[key] !== hash) {
                updatedModules.add(module, chunk);
              }
              chunkModuleHashes[key] = hash;
            }
          }
        } else {
          for (const module of modules) {
            const key = `${chunk.id}|${module.identifier()}`;
            const hash = getModuleHash(module);
            if (records.chunkModuleHashes[key] !== hash) {
              updatedModules.add(module, chunk);
            }
            chunkModuleHashes[key] = hash;
          }
        }
      } else {
        if (fullHashModulesInThisChunk !== undefined) {
          for (const module of modules) {
            const key = `${chunk.id}|${module.identifier()}`;
            const hash = getModuleHash(module);
            if (
              fullHashModulesInThisChunk.has(/** @type {RuntimeModule} */(module))
            ) {
              fullHashChunkModuleHashes[key] = hash;
            } else {
              chunkModuleHashes[key] = hash;
            }
          }
        } else {
          for (const module of modules) {
            const key = `${chunk.id}|${module.identifier()}`;
            const hash = getModuleHash(module);
            chunkModuleHashes[key] = hash;
          }
        }
      }
    }
  }

  hotIndex = records.hotIndex || 0;
  if (updatedModules.size > 0) hotIndex++;

  hash.update(`${hotIndex}`);
});
代码代码有些长,慢慢分析。
先是获取所有改动后的chunk,然后遍历获取chunk的modules存储到fullHashModules中,将这里面每个module的hash存放到updateModules或者chunkModuleHashes中,然后执行参数hash的update方法。那这个update又做了什么呢?而update更新自身的hash值。
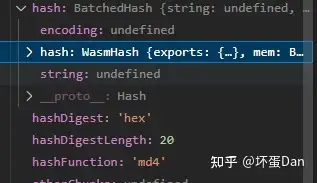
hash & hashFunction
然后来看下processAssets这个hook做了什么,由于代码很长,所以这里进行分段处理,先来看第一段
    ...省略
    const hotUpdateMainContentByRuntime = new Map();
    ...省略
    forEachRuntime(allOldRuntime, runtime => {
      const { path: filename, info: assetInfo } =
        compilation.getPathWithInfo(
          compilation.outputOptions.hotUpdateMainFilename,
          {
            hash: records.hash,
            runtime
          }
        );
      hotUpdateMainContentByRuntime.set(runtime, {
        updatedChunkIds: new Set(),
        removedChunkIds: new Set(),
        removedModules: new Set(),
        filename,
        assetInfo
      });
    });
if (hotUpdateMainContentByRuntime.size === 0) return;先是合并新旧runtime的key值,然后遍历这个合并后的allOldRuntime,将hash和runtime合并。而这个合并后的filename则是你非常熟悉的,每次热更新请求的json文件便是这个名字,而这个名字是和你在webpack.config.xx中配置的,比如我这里配置的是[name].[fullHash].js,这里得到的filename便是这个格式加上.hot-update.json。完整的就是[name].[fullHash].hot-update.json。然后存储到hotUpdateMainContentByRuntime的map中。如果没有需要更新的就直接返回。
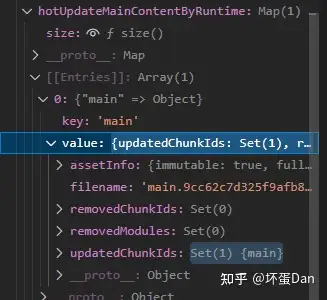
接着往下看,接下来这段很长,但是没办法,因为都是相连的内容。
for (const key of Object.keys(records.chunkHashes)) {
  const oldRuntime = keyToRuntime(records.chunkRuntime[key]);
  /** @type {Module[]} */
  const remainingModules = [];
  // Check which modules are removed
  for (const id of records.chunkModuleIds[key]) {
    const module = allModules.get(id);
    if (module === undefined) {
      completelyRemovedModules.add(id);
    } else {
      remainingModules.push(module);
    }
  }

  let chunkId;
  let newModules;
  let newRuntimeModules;
  let newFullHashModules;
  let newDependentHashModules;
  let newRuntime;
  let removedFromRuntime;
  const currentChunk = find(
    compilation.chunks,
    chunk => `${chunk.id}` === key
  );
  if (currentChunk) {
    chunkId = currentChunk.id;
    newRuntime = intersectRuntime(
      currentChunk.runtime,
      allOldRuntime
    );
    if (newRuntime === undefined) continue;
    newModules = chunkGraph
      .getChunkModules(currentChunk)
      .filter(module => updatedModules.has(module, currentChunk));
    newRuntimeModules = Array.from(
      chunkGraph.getChunkRuntimeModulesIterable(currentChunk)
    ).filter(module => updatedModules.has(module, currentChunk));
    const fullHashModules =
      chunkGraph.getChunkFullHashModulesIterable(currentChunk);
    newFullHashModules =
      fullHashModules &&
      Array.from(fullHashModules).filter(module =>
        updatedModules.has(module, currentChunk)
      );
    const dependentHashModules =
      chunkGraph.getChunkDependentHashModulesIterable(currentChunk);
    newDependentHashModules =
      dependentHashModules &&
      Array.from(dependentHashModules).filter(module =>
        updatedModules.has(module, currentChunk)
      );
    removedFromRuntime = subtractRuntime(oldRuntime, newRuntime);
  } else {
    // chunk has completely removed
    chunkId = `${+key}` === key ? +key : key;
    removedFromRuntime = oldRuntime;
    newRuntime = oldRuntime;
  }
  if (removedFromRuntime) {
    // chunk was removed from some runtimes
    forEachRuntime(removedFromRuntime, runtime => {
      hotUpdateMainContentByRuntime
        .get(runtime)
        .removedChunkIds.add(chunkId);
    });
    // dispose modules from the chunk in these runtimes
    // where they are no longer in this runtime
    for (const module of remainingModules) {
      const moduleKey = `${key}|${module.identifier()}`;
      const oldHash = records.chunkModuleHashes[moduleKey];
      const runtimes = chunkGraph.getModuleRuntimes(module);
      if (oldRuntime === newRuntime && runtimes.has(newRuntime)) {
        // Module is still in the same runtime combination
        const hash = nonCodeGeneratedModules.has(module, newRuntime)
          ? chunkGraph.getModuleHash(module, newRuntime)
          : compilation.codeGenerationResults.getHash(
            module,
            newRuntime
          );
        if (hash !== oldHash) {
          if (module.type === "runtime") {
            newRuntimeModules = newRuntimeModules || [];
            newRuntimeModules.push(
              /** @type {RuntimeModule} */(module)
            );
          } else {
            newModules = newModules || [];
            newModules.push(module);
          }
        }
      } else {
        // module is no longer in this runtime combination
        // We (incorrectly) assume that it's not in an overlapping runtime combination
        // and dispose it from the main runtimes the chunk was removed from
        forEachRuntime(removedFromRuntime, runtime => {
          // If the module is still used in this runtime, do not dispose it
          // This could create a bad runtime state where the module is still loaded,
          // but no chunk which contains it. This means we don't receive further HMR updates
          // to this module and that's bad.
          // TODO force load one of the chunks which contains the module
          for (const moduleRuntime of runtimes) {
            if (typeof moduleRuntime === "string") {
              if (moduleRuntime === runtime) return;
            } else if (moduleRuntime !== undefined) {
              if (moduleRuntime.has(runtime)) return;
            }
          }
          hotUpdateMainContentByRuntime
            .get(runtime)
            .removedModules.add(module);
        });
      }
    }
  }
  if (
    (newModules && newModules.length > 0) ||
    (newRuntimeModules && newRuntimeModules.length > 0)
  ) {
    const hotUpdateChunk = new HotUpdateChunk();
    if (backCompat)
      ChunkGraph.setChunkGraphForChunk(hotUpdateChunk, chunkGraph);
    hotUpdateChunk.id = chunkId;
    hotUpdateChunk.runtime = newRuntime;
    if (currentChunk) {
      for (const group of currentChunk.groupsIterable)
        hotUpdateChunk.addGroup(group);
    }
    chunkGraph.attachModules(hotUpdateChunk, newModules || []);
    chunkGraph.attachRuntimeModules(
      hotUpdateChunk,
      newRuntimeModules || []
    );
    if (newFullHashModules) {
      chunkGraph.attachFullHashModules(
        hotUpdateChunk,
        newFullHashModules
      );
    }
    if (newDependentHashModules) {
      chunkGraph.attachDependentHashModules(
        hotUpdateChunk,
        newDependentHashModules
      );
    }
    const renderManifest = compilation.getRenderManifest({
      chunk: hotUpdateChunk,
      hash: records.hash,
      fullHash: records.hash,
      outputOptions: compilation.outputOptions,
      moduleTemplates: compilation.moduleTemplates,
      dependencyTemplates: compilation.dependencyTemplates,
      codeGenerationResults: compilation.codeGenerationResults,
      runtimeTemplate: compilation.runtimeTemplate,
      moduleGraph: compilation.moduleGraph,
      chunkGraph
    });
    for (const entry of renderManifest) {
      /** @type {string} */
      let filename;
      /** @type {AssetInfo} */
      let assetInfo;
      if ("filename" in entry) {
        filename = entry.filename;
        assetInfo = entry.info;
      } else {
        ({ path: filename, info: assetInfo } =
          compilation.getPathWithInfo(
            entry.filenameTemplate,
            entry.pathOptions
          ));
      }
      const source = entry.render();
      compilation.additionalChunkAssets.push(filename);
      compilation.emitAsset(filename, source, {
        hotModuleReplacement: true,
        ...assetInfo
      });
      if (currentChunk) {
        currentChunk.files.add(filename);
        compilation.hooks.chunkAsset.call(currentChunk, filename);
      }
    }
    forEachRuntime(newRuntime, runtime => {
      hotUpdateMainContentByRuntime
        .get(runtime)
        .updatedChunkIds.add(chunkId);
    });
  }
}接着便是一大段diff操作,先是拿到compilation中所有module,也就是所有有效的module,然后遍历所有被record记录的旧的chunk,判断chunk的modules是否需要保留还是移除,如果id还在就保留,push到remainingModules中,移除的push到completeRemovedModules中。
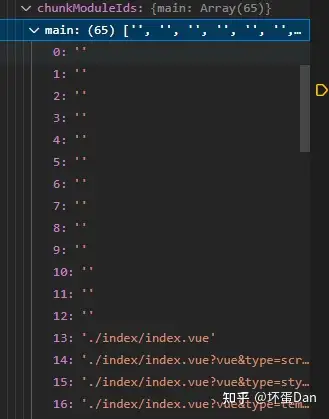
然后判断这个chunk是否还在这个runtime中,如果不存在了则将这个chunk从和它有关系的rumtime中移除。然后从这个chunk保留的module中进行diff处理。对runtime进行判断,如果runtime变了或者不存在了则判断是否可以将这个module加入到更新后的runtime的移除列表中,如果和模块有联系的runtime中还有对它有依赖的,则不放入。如果这个chunk没变,则diff处理,先是从records中拿更新前自己的hash值,如果新旧不一样则判断type是否是runtime,是则存放到newRuntimeModules,否则存入newModules中。
接着判断是否存在新的module,如果有则先是生成一个新的hotUpdateChunk实例,将这个chunk的runtime指向更新后的runtime,然后判断当前的chunk是否存在,存在则将这个chunk的groupsIterable存入新生成的chunk中。然后在chunkGraph,chunk的图中将新的module和这个新生成的chunk联系到一起中。
接着执行compilation.getRenderManifest,生成一组复杂的映射,这张表存放着module、chunk以及runtime之间的关系。然后遍历这组映射,生成新的source即代码。然后执行compilation.emitAsset将数据发送出去。然后判断当前chunk是否还在,在则执行chunkAsset.call并传入当前的chunk和filename
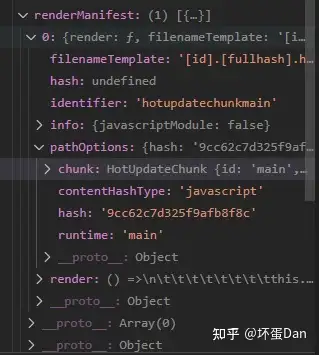
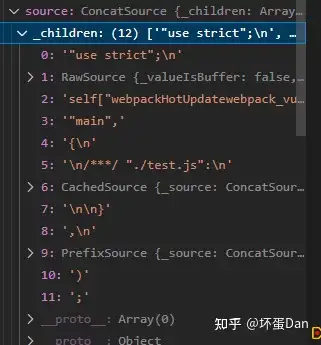
接着将更新的chunkId存储到新runtime中的更新列表中。
这里在runtime、module和chunk之间跳来跳去的,有些乱。梳理下这三者的关系,chunk是由多个module组成,而runtime看名字就知道是运行用的。runtime会在某个时刻根据manifest(模块之间的映射关系)加载和解析module。其中runtime会被注入到代码中参与打包,帮你加载模块,做懒加载等。
然后结束循环,往下看。
const completelyRemovedModulesArray = Array.from(
  completelyRemovedModules
);
const hotUpdateMainContentByFilename = new Map();
for (const {
  removedChunkIds,
  removedModules,
  updatedChunkIds,
  filename,
  assetInfo
} of hotUpdateMainContentByRuntime.values()) {
  const old = hotUpdateMainContentByFilename.get(filename);
  if (
    old &&
    (!isSubset(old.removedChunkIds, removedChunkIds) ||
      !isSubset(old.removedModules, removedModules) ||
      !isSubset(old.updatedChunkIds, updatedChunkIds))
  ) {
    compilation.warnings.push(
      new WebpackError(`HotModuleReplacementPlugin
The configured output.hotUpdateMainFilename doesn't lead to unique filenames per runtime and HMR update differs between runtimes.
This might lead to incorrect runtime behavior of the applied update.
To fix this, make sure to include [runtime] in the output.hotUpdateMainFilename option, or use the default config.`)
    );
    for (const chunkId of removedChunkIds)
      old.removedChunkIds.add(chunkId);
    for (const chunkId of removedModules)
      old.removedModules.add(chunkId);
    for (const chunkId of updatedChunkIds)
      old.updatedChunkIds.add(chunkId);
    continue;
  }
  hotUpdateMainContentByFilename.set(filename, {
    removedChunkIds,
    removedModules,
    updatedChunkIds,
    assetInfo
  });
}
for (const [
  filename,
  { removedChunkIds, removedModules, updatedChunkIds, assetInfo }
] of hotUpdateMainContentByFilename) {
  const hotUpdateMainJson = {
    c: Array.from(updatedChunkIds),
    r: Array.from(removedChunkIds),
    m:
      removedModules.size === 0
        ? completelyRemovedModulesArray
        : completelyRemovedModulesArray.concat(
          Array.from(removedModules, m =>
            chunkGraph.getModuleId(m)
          )
        )
  };

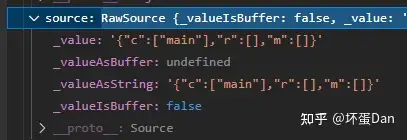
  const source = new RawSource(JSON.stringify(hotUpdateMainJson));
  compilation.emitAsset(filename, source, {
    hotModuleReplacement: true,
    ...assetInfo
  });
}然后结束循环。然后开始组装最终增删改的数据。r: remove, c: chunkIds, m: removeModules。接着将这个json通过new RawSource转换为source实例。然后又调用compilation.emitAsset将数据传出去,存储到compilation实例的assetInfo中。
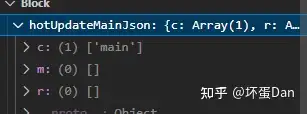
然后我们再来看下additionalTreeRuntimeRequirements这个hook。
compilation.hooks.additionalTreeRuntimeRequirements.tap(
  "HotModuleReplacementPlugin",
  (chunk, runtimeRequirements) => {
    runtimeRequirements.add(RuntimeGlobals.hmrDownloadManifest);
    runtimeRequirements.add(RuntimeGlobals.hmrDownloadUpdateHandlers);
    runtimeRequirements.add(RuntimeGlobals.interceptModuleExecution);
    runtimeRequirements.add(RuntimeGlobals.moduleCache);
    compilation.addRuntimeModule(
      chunk,
      new HotModuleReplacementRuntimeModule()
    );
  }
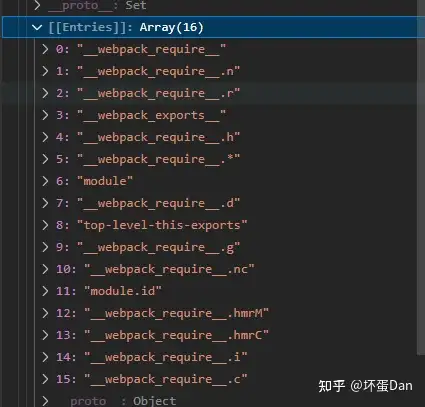
);这个hook代码很少,但是非常重要。我们得先知道这个hook在哪里被调用的。
在compilation的processRuntimeRequirements方法中,而这个方法被seal调用了。而seal做了什么就不说了,前面文章中有提到过。[14]
前面四个add就不说了,看下数据即可。都是webpack需要的runtime
重点是这个new HotModuleReplacementRuntimeModule ,它是一个module,参与打包的,所以这里面的东西肯定就是一段runtime,果然,进去后看到generate方法return了一个template ,这些replace都是将里面的变量名替换成到时runtime中的变量名。
class HotModuleReplacementRuntimeModule extends RuntimeModule {
	constructor() {
		super("hot module replacement", RuntimeModule.STAGE_BASIC);
	}
	/**
	 * @returns {string} runtime code
	 */
	generate() {
		return Template.getFunctionContent(
			require("./HotModuleReplacement.runtime.js")
		)
			.replace(/\$getFullHash\$/g, RuntimeGlobals.getFullHash)
			.replace(
				/\$interceptModuleExecution\$/g,
				RuntimeGlobals.interceptModuleExecution
			)
			.replace(/\$moduleCache\$/g, RuntimeGlobals.moduleCache)
			.replace(/\$hmrModuleData\$/g, RuntimeGlobals.hmrModuleData)
			.replace(/\$hmrDownloadManifest\$/g, RuntimeGlobals.hmrDownloadManifest)
			.replace(
				/\$hmrInvalidateModuleHandlers\$/g,
				RuntimeGlobals.hmrInvalidateModuleHandlers
			)
			.replace(
				/\$hmrDownloadUpdateHandlers\$/g,
				RuntimeGlobals.hmrDownloadUpdateHandlers
			);
	}
}我们进去HotModuleReplacement.runtime.js中,我们进去HotModuleReplacement.runtime.js中,这里面的东西都是runtime,所以你没办法在这里面看到想要的数据,只能转战到浏览器中打断点。
代码有些长,慢慢分析。
// ...省略
var currentModuleData = {};
var installedModules = $moduleCache$;

// module and require creation
var currentChildModule;
var currentParents = [];

// status
var registeredStatusHandlers = [];
var currentStatus = "idle";

// while downloading
var blockingPromises = 0;
var blockingPromisesWaiting = [];

// The update info
var currentUpdateApplyHandlers;
var queuedInvalidatedModules;

// eslint-disable-next-line no-unused-vars
$hmrModuleData$ = currentModuleData;

$interceptModuleExecution$.push(function (options) {
  var module = options.module;
  var require = createRequire(options.require, options.id);
  module.hot = createModuleHotObject(options.id, module);
  module.parents = currentParents;
  module.children = [];
  currentParents = [];
  options.require = require;
});

$hmrDownloadUpdateHandlers$ = {};
$hmrInvalidateModuleHandlers$ = {};
// ...省略这一块就是在初始化一些全局变量的数据,比如hmrDownloadUpdateHandler等。重点是这个$interceptModuleExecution,一个全局的拦截器,在模块执行前执行这个函数,接着来看下createRequire
function createRequire(require, moduleId) {
  var me = installedModules[moduleId];
  if (!me) return require;
  var fn = function (request) {
    if (me.hot.active) {
      if (installedModules[request]) {
        var parents = installedModules[request].parents;
        if (parents.indexOf(moduleId) === -1) {
          parents.push(moduleId);
        }
      } else {
        currentParents = [moduleId];
        currentChildModule = request;
      }
      if (me.children.indexOf(request) === -1) {
        me.children.push(request);
      }
    } else {
      console.warn(
        "[HMR] unexpected require(" +
          request +
          ") from disposed module " +
          moduleId
      );
      currentParents = [];
    }
    return require(request);
  };
  var createPropertyDescriptor = function (name) {
    return {
      configurable: true,
      enumerable: true,
      get: function () {
        return require[name];
      },
      set: function (value) {
        require[name] = value;
      }
    };
  };
  for (var name in require) {
    if (Object.prototype.hasOwnProperty.call(require, name) && name !== "e") {
      Object.defineProperty(fn, name, createPropertyDescriptor(name));
    }
  }
  fn.e = function (chunkId) {
    return trackBlockingPromise(require.e(chunkId));
  };
  return fn;
} 这块功能很简单,就是封装传入的require,将属于require的字段都放到新的中,这样当require的字段发生变化后能同步到这个封装的函数上。而看到fn,先是判断是否是hot.active是否是有效module。如果是就获取这个module的parents和children,判断是否有建立关系,没有则建立。
接着往下看createModuleHotObject
function createModuleHotObject(moduleId, me) {
  var _main = currentChildModule !== moduleId;
  var hot = {
    // private stuff
    _acceptedDependencies: {},
    _acceptedErrorHandlers: {},
    _declinedDependencies: {},
    _selfAccepted: false,
    _selfDeclined: false,
    _selfInvalidated: false,
    _disposeHandlers: [],
    _main: _main,
    _requireSelf: function () {
      currentParents = me.parents.slice();
      currentChildModule = _main ? undefined : moduleId;
      __vite_rsc_require__(moduleId);
    },

    // Module API
    active: true,
    accept: function (dep, callback, errorHandler) {
      if (dep === undefined) hot._selfAccepted = true;
      else if (typeof dep === "function") hot._selfAccepted = dep;
      else if (typeof dep === "object" && dep !== null) {
        for (var i = 0; i < dep.length; i++) {
          hot._acceptedDependencies[dep[i]] = callback || function () {};
          hot._acceptedErrorHandlers[dep[i]] = errorHandler;
        }
      } else {
        hot._acceptedDependencies[dep] = callback || function () {};
        hot._acceptedErrorHandlers[dep] = errorHandler;
      }
    },
    decline: function (dep) {
      if (dep === undefined) hot._selfDeclined = true;
      else if (typeof dep === "object" && dep !== null)
        for (var i = 0; i < dep.length; i++)
          hot._declinedDependencies[dep[i]] = true;
      else hot._declinedDependencies[dep] = true;
    },
    dispose: function (callback) {
      hot._disposeHandlers.push(callback);
    },
    addDisposeHandler: function (callback) {
      hot._disposeHandlers.push(callback);
    },
    removeDisposeHandler: function (callback) {
      var idx = hot._disposeHandlers.indexOf(callback);
      if (idx >= 0) hot._disposeHandlers.splice(idx, 1);
    },
    invalidate: function () {
      this._selfInvalidated = true;
      switch (currentStatus) {
        case "idle":
          currentUpdateApplyHandlers = [];
          Object.keys($hmrInvalidateModuleHandlers$).forEach(function (key) {
            $hmrInvalidateModuleHandlers$[key](
              moduleId,
              currentUpdateApplyHandlers
            );
          });
          setStatus("ready");
          break;
        case "ready":
          Object.keys($hmrInvalidateModuleHandlers$).forEach(function (key) {
            $hmrInvalidateModuleHandlers$[key](
              moduleId,
              currentUpdateApplyHandlers
            );
          });
          break;
        case "prepare":
        case "check":
        case "dispose":
        case "apply":
          (queuedInvalidatedModules = queuedInvalidatedModules || []).push(
            moduleId
          );
          break;
        default:
          // ignore requests in error states
          break;
      }
    },

    // Management API
    check: hotCheck,
    apply: hotApply,
    status: function (l) {
      if (!l) return currentStatus;
      registeredStatusHandlers.push(l);
    },
    addStatusHandler: function (l) {
      registeredStatusHandlers.push(l);
    },
    removeStatusHandler: function (l) {
      var idx = registeredStatusHandlers.indexOf(l);
      if (idx >= 0) registeredStatusHandlers.splice(idx, 1);
    },

    //inherit from previous dispose call
    data: currentModuleData[moduleId]
  };
  currentChildModule = undefined;
  return hot;
} 接着往下看createModuleHotObject,这个也很简单,实际上返回了个对象,然后将它绑定到module.hot上。但是眼尖的你已经看到一个对我们来说很熟悉的东西——check:HotCheck。之前说webpack/hot/dev-server的时候将check(true)这个当作线索,一个和热更新相关的线索。所以让我们赶紧来看下这个hotCheck方法做了什么。
function hotCheck(applyOnUpdate) {
  if (currentStatus !== "idle") {
    throw new Error("check() is only allowed in idle status");
  }
  return setStatus("check")
    .then($hmrDownloadManifest$)
    .then(function (update) {
      if (!update) {
        return setStatus(applyInvalidatedModules() ? "ready" : "idle").then(
          function () {
            return null;
          }
        );
      }
      return setStatus("prepare").then(function () {
        var updatedModules = [];
        currentUpdateApplyHandlers = [];
        return Promise.all(
          Object.keys($hmrDownloadUpdateHandlers$).reduce(function (
            promises,
            key
          ) {
            $hmrDownloadUpdateHandlers$[key](
              update.c,
              update.r,
              update.m,
              promises,
              currentUpdateApplyHandlers,
              updatedModules
            );
            return promises;
          },
            [])
        ).then(function () {
          return waitForBlockingPromises(function () {
            if (applyOnUpdate) {
              return internalApply(applyOnUpdate);
            } else {
              return setStatus("ready").then(function () {
                return updatedModules;
              });
            }
          });
        });
      });
    });
}$hmrDownloadManifest$: 一看就知道这是个很重要的东西,但这里被变量挡住了,所以我们只能去浏览器那边调试看下这是个什么东西。在浏览器中表现为__vite_rsc_require__.hmrM。
/******/ 		__vite_rsc_require__.hmrM = () => {
/******/ 			if (typeof fetch === "undefined") throw new Error("No browser support: need fetch API");
/******/ 			return fetch(__vite_rsc_require__.p + __vite_rsc_require__.hmrF()).then((response) => {
/******/ 				if(response.status === 404) return; // no update available
/******/ 				if(!response.ok) throw new Error("Failed to fetch update manifest " + response.statusText);
/******/ 				return response.json();
/******/ 			});
/******/ 		};
可以看出这是一个请求并返回请求内容
__vite_rsc_require__.p:

__vite_rsc_require__.hmrF:
(() => {
/******/ 		__vite_rsc_require__.hmrF = () => ("main." + __vite_rsc_require__.h() + ".hot-update.json");
/******/ })(); __vite_rsc_require__.h:

拼接到一起就是我们心心念念的[name].[fullhash].hot-update.json。所以$hmrDownloadManifest$是向我们的dev发送了一个请求,请求的json文件。
$hmrDownloadUpdateHandlers$: 替换为__vite_rsc_require__.hmrC全局变量
__vite_rsc_require__.hmrC.jsonp = function (
  chunkIds,// = update.c,
  removedChunks,// = update.r,
  removedModules,// = update.m,
  promises,// = promises,
  applyHandlers,// = currentUpdateApplyHandlers,
  updatedModulesList// = updatedModules
) {
  applyHandlers.push(applyHandler);
  currentUpdateChunks = {};
  currentUpdateRemovedChunks = removedChunks;
  currentUpdate = removedModules.reduce(function (obj, key) {
    obj[key] = false;
    return obj;
  }, {});
  currentUpdateRuntime = [];
  chunkIds.forEach(function (chunkId) {
    if (
      __vite_rsc_require__.o(installedChunks, chunkId) &&
      installedChunks[chunkId] !== undefined
    ) {
      promises.push(loadUpdateChunk(chunkId, updatedModulesList));
      currentUpdateChunks[chunkId] = true;
    } else {
      currentUpdateChunks[chunkId] = false;
    }
  });
  if (__vite_rsc_require__.f) {
    __vite_rsc_require__.f.jsonpHmr = function (chunkId, promises) {
      if (
        currentUpdateChunks &&
        __vite_rsc_require__.o(currentUpdateChunks, chunkId) &&
        !currentUpdateChunks[chunkId]
      ) {
        promises.push(loadUpdateChunk(chunkId));
        currentUpdateChunks[chunkId] = true;
      }
    };
  }
};__vite_rsc_require__.oloadUpdateChunk__vite_rsc_require__.f:undefined
(() => {
  __vite_rsc_require__.o = (obj, prop) => (Object.prototype.hasOwnProperty.call(obj, prop))
})();

function loadUpdateChunk(chunkId, updatedModulesList) {
  currentUpdatedModulesList = updatedModulesList;
  return new Promise((resolve, reject) => {
    waitingUpdateResolves[chunkId] = resolve;
    // start update chunk loading
    var url = __vite_rsc_require__.p + __vite_rsc_require__.hu(chunkId);
    // create error before stack unwound to get useful stacktrace later
    var error = new Error();
    var loadingEnded = (event) => {
      if (waitingUpdateResolves[chunkId]) {
        waitingUpdateResolves[chunkId] = undefined
        var errorType = event && (event.type === 'load' ? 'missing' : event.type);
        var realSrc = event && event.target && event.target.src;
        error.message = 'Loading hot update chunk ' + chunkId + ' failed.\n(' + errorType + ': ' + realSrc + ')';
        error.name = 'ChunkLoadError';
        error.type = errorType;
        error.request = realSrc;
        reject(error);
      }
    };
    __vite_rsc_require__.l(url, loadingEnded);
  });
}__vite_rsc_require__.hu:__vite_rsc_require__.l:__vite_rsc_require__.nc:undefined
(() => {
  // This function allow to reference all chunks
  __vite_rsc_require__.hu = (chunkId) => {
    // return url for filenames based on template
    return "" + chunkId + "." + __vite_rsc_require__.h() + ".hot-update.js";
  };
})();

(() => {
  var inProgress = {};
  var dataWebpackPrefix = "webpack-vue:";
  // loadScript function to load a script via script tag
  __vite_rsc_require__.l = (url, done, key, chunkId) => {
    if (inProgress[url]) { inProgress[url].push(done); return; }
    var script, needAttach;
    if (key !== undefined) {
      var scripts = document.getElementsByTagName("script");
      for (var i = 0; i < scripts.length; i++) {
        var s = scripts[i];
        if (s.getAttribute("src") == url || s.getAttribute("data-webpack") == dataWebpackPrefix + key) { script = s; break; }
      }
    }
    if (!script) {
      needAttach = true;
      script = document.createElement('script');

      script.charset = 'utf-8';
      script.timeout = 120;
      if (__vite_rsc_require__.nc) {
        script.setAttribute("nonce", __vite_rsc_require__.nc);
      }
      script.setAttribute("data-webpack", dataWebpackPrefix + key);
      script.src = url;
    }
    inProgress[url] = [done];
    var onScriptComplete = (prev, event) => {
      // avoid mem leaks in IE.
      script.onerror = script.onload = null;
      clearTimeout(timeout);
      var doneFns = inProgress[url];
      delete inProgress[url];
      script.parentNode && script.parentNode.removeChild(script);
      doneFns && doneFns.forEach((fn) => (fn(event)));
      if (prev) return prev(event);
    }
      ;
    var timeout = setTimeout(onScriptComplete.bind(null, undefined, { type: 'timeout', target: script }), 120000);
    script.onerror = onScriptComplete.bind(null, script.onerror);
    script.onload = onScriptComplete.bind(null, script.onload);
    needAttach && document.head.appendChild(script);
  };
})();
代码虽多,但是都很好理解。
$hmrDownloadUpdateHandlers$也就是__wepback_require__.hmrC的key:jsonp的数据是请求的[name].[fullhash].hot-update.json文件返回的json数据。遍历chunkIds,如果注册完毕的chunk中有这个chunk并且这个chunk不为undefined则请求并加载这个chunk。
loadUpdateChunk,拼接请求文件路径,异步执行__vite_rsc_require__.l。
__vite_rsc_require__.l则是做了两件事,一是根据路径请求js文件,二是将文件通过script将文件放入html的head中这种方式引入到页面中完成热替换。
这里也就解决了另一个问题:怎么去替换对应模块的的。


最后hotCheck这个方法将状态和json返回给webpack/hot/dev-server中。
总结一下HotModuleReplacement.runtime.js
简单的说就是一段runtime跟随编译到代码中,运行在浏览器中。注入一个拦截器在module加载执行前执行,封装module的require,在被请求的时候将module和module的parent、children建立联系。将hot对象的数据api绑定到module的hot字段上。
而这些方法中有一个check方法被webpack/hot/dev-server.js这段runtime调用。
在websocketServer发送ok给client之后webpack/hot/dev-server.js就调用这个方法。
而这个方法中先是请求一个[name].[fullhash].json的文件,拿到diff后需要更新删除的数据。然后再根据这个json数据执行loadupdateChunk,根据数据拼接chunk的请求文件路径,然后执行__vite_rsc_require__.l先是根据路径请求对应的js文件,然后将请求回来的文件通过script引入到html的head中来实现模块的热替换。最后将状态返回给webpack/hot/dev-server.js这段runtime中,然后dev-server.js判断是否是正常状态,不正常执行reload。
然后回到HotModuleReplacementPlugin中。additionalTreeRuntimeRequirements这个hook也就讲完了,这个hook最重要的事情就是将HotModuleReplacement.runtime.js这段runtime通过module的方式注入到代码中跟随打包编译上到浏览器中。
接着看下HotModuleReplacementPlugin中最后一段代码。
最后是监听parser, 在code generate时将传入的模板转换成代码。
normalModuleFactory.hooks.parser
.for("javascript/auto")
.tap("HotModuleReplacementPlugin", parser => {
  applyModuleHot(parser);
  applyImportMetaHot(parser);
});
normalModuleFactory.hooks.parser
.for("javascript/dynamic")
.tap("HotModuleReplacementPlugin", parser => {
  applyModuleHot(parser);
});
normalModuleFactory.hooks.parser
.for("javascript/esm")
.tap("HotModuleReplacementPlugin", parser => {
  applyImportMetaHot(parser);
});

const applyModuleHot = parser => {
  parser.hooks.evaluateIdentifier.for("module.hot").tap(
    {
      name: "HotModuleReplacementPlugin",
      before: "NodeStuffPlugin"
    },
    expr => {
      return evaluateToIdentifier(
        "module.hot",
        "module",
        () => ["hot"],
        true
      )(expr);
    }
  );
  parser.hooks.call
    .for("module.hot.accept")
    .tap(
      "HotModuleReplacementPlugin",
      createAcceptHandler(parser, ModuleHotAcceptDependency)
    );
  parser.hooks.call
    .for("module.hot.decline")
    .tap(
      "HotModuleReplacementPlugin",
      createDeclineHandler(parser, ModuleHotDeclineDependency)
    );
  parser.hooks.expression
    .for("module.hot")
    .tap("HotModuleReplacementPlugin", createHMRExpressionHandler(parser));
};

const applyImportMetaHot = parser => {
  parser.hooks.evaluateIdentifier
    .for("import.meta.webpackHot")
    .tap("HotModuleReplacementPlugin", expr => {
      return evaluateToIdentifier(
        "import.meta.webpackHot",
        "import.meta",
        () => ["webpackHot"],
        true
      )(expr);
    });
  parser.hooks.call
    .for("import.meta.webpackHot.accept")
    .tap(
      "HotModuleReplacementPlugin",
      createAcceptHandler(parser, ImportMetaHotAcceptDependency)
    );
  parser.hooks.call
    .for("import.meta.webpackHot.decline")
    .tap(
      "HotModuleReplacementPlugin",
      createDeclineHandler(parser, ImportMetaHotDeclineDependency)
    );
  parser.hooks.expression
    .for("import.meta.webpackHot")
    .tap("HotModuleReplacementPlugin", createHMRExpressionHandler(parser));
};ok。HotModuleReplacementPlugin也就讲完了。
总结一下HotModuleReplacementPlugin做了什么。
首先是定义module.hot以及import.meta.webpackHot的api和template。
然后便是监听compilation的record、fullHash、processAssets、additionalTreeRuntimeRequirements这四个hook。
其中record是将数据存储起来,比如module、chunk、runtime等,用途是等到下次热更新可以用于新旧diff。
而fullHash则是将遍历chunk,将他们的module等数据放入到公共变量中,然后更新hash值。这个hook相当于在整理数据,给processAssets这个hook做准备。而这个hook在compilation.createHash时执行。
processAssets则是将数据进行了diff处理,然后整理出更新后的数据后调用compilation.emitAsset发送出去。如何diff的请往回看,那里做了分析。
而additionalTreeRuntimeRequirements做的事情很简单,就是处理一些全局变量,然后将HotModuleReplacement.runtime.js这段runtime以module的方式参与打包编译。至于这段runtime做了什么往回看,上面做了分析和总结。
最后监听parser,在code generate时将template转换为code。
然后让我们回到webpack-dev-server/lib/Server.js的initialize方法中。这个方法也讲完了。
总结下webpack-dev-server/lib/Server.js的initialize做了什么。
先是执行addAdditionalEntries方法,将websocket需要的一些参数拼装到webpack-dev-server/client/index.js的请求路径中以及将webpack/hot/dev-server.js这段runtime存入additionalEntries中参与编译打包。至于这两个文件中做了什么请往上看,已经做过分析了就不多说了。
接着执行new webpack.providePlugin,将一些东西存储到全局中,这样打包后的bundle也能使用。
接着引入并执行HotModuleReplacementPlugin,注入runtime。里面做了什么请往上看。
然后执行setupHooks,监听编译结束通知浏览器可以请求文件了。
接着执行setupApp方法,开启一个express本地服务器,到时浏览器请求的文件都从这个服务器里返回。
然后执行setupHostHeaderCheck,对请求的header进行判断。
setupDevMiddleware:引入webpack-dev-middleware这个插件,将这个server和webpack连接起来。重写compiler的outputFileSystem,从文件存储变成对象内存存储。然后调用compiler的watchFileSystem创建监听者监听参与打包的文件。当文件发生变化时通知webpack打包编译,编译done后通知websocket发送状态。引入中间件,将从webpack中拿到的编译后的数据缓存到内存中。具体的分析可以往上看。
然后监听静态文件变化,引入chokidar插件,可以在浏览器中查看文件。
然后use一堆中间件,甘心去的可以往上看。
然后创建websocket的server。
最后监听进程,监听进程终止。
然后我们再回到webpack-dev-server/lib/Server.js的start方法中。
这个方法总结下就是先初始化数据,然后执行initialize方法,然后服务器开启并监听端口。
终于,这东西终于分析完了。。。
让我们回过头来看下我们的问题
问题1:webpack是如何知道资源变化的?#
在调用webpack-dev-middleware这个插件时,通知compiler调用自己的watchFileSystem监听打包的文件变化(虽然没有具体深入里面的代码分析。。)
问题2:怎么去替换对应的模块的?#
简单的说就是将三段runtime注入到浏览器中,本地起一个服务器,开一个websocket server,浏览器开一个websocket client。当改动的文件编译完之后调用done这个hook通知server去传递当前编译的状态,浏览器接收到状态之后判断是否可以热更新,不行直接reload。如果没问题则浏览器发起请求,先是请求一个带有hash的json文件,里面存放的数据是diff后最终的改动数据,然后浏览器再根据这个文件里的数据去请求对应带有hash的js文件并通过script插入到html的head标签中完成热替换。
偷一张大佬的图[15]
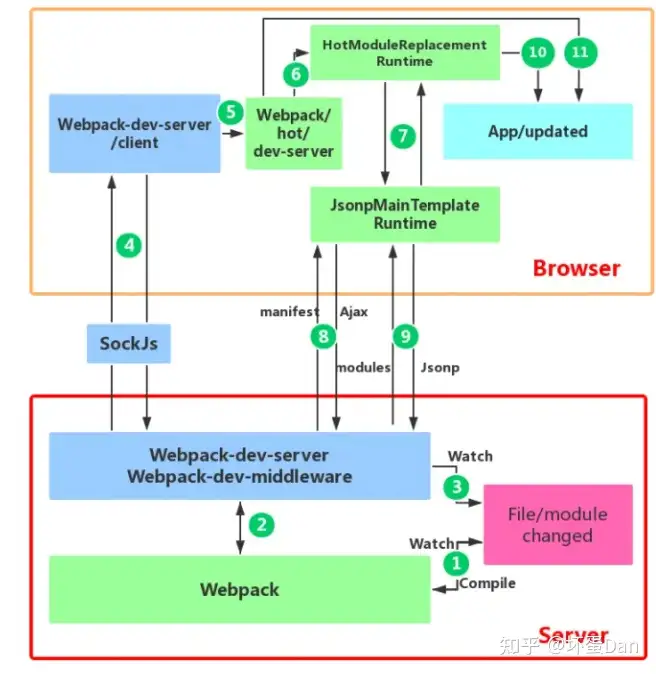
这文章断断续续,前后分析了一个多月,如果大佬觉得有用麻烦点个赞,谢谢!
参考#
- ^process-argv https://nodejs.org/api/process.html#processargv
- ^provide-plugin https://webpack.js.org/plugins/provide-plugin/#root
- ^express https://expressjs.com/en/starter/installing.html
- ^webpack-dev-middleware https://webpack.js.org/guides/development/#using-webpack-dev-middleware
- ^memfs https://www.npmjs.com/package/memfs
- ^hooks-watchRun https://webpack.js.org/api/compiler-hooks/#watchrun
- ^assetsEmitted https://webpack.js.org/api/compiler-hooks/#assetemitted
- ^chokidar https://github.com/paulmillr/chokidar
- ^express-compression https://github.com/expressjs/compression
- ^serve-index http://expressjs.com/en/resources/middleware/serve-index.html
- ^hooks-compilation https://webpack.js.org/api/compiler-hooks/#compilation
- ^compilation-hooks-record https://webpack.js.org/api/compilation-hooks/#record
- ^hooks-processAssets https://webpack.js.org/api/compilation-hooks/#processassets
- ^compilation-hook-seal https://webpack.js.org/api/compilation-hooks/#seal
- ^大佬的文章链接 https://zhuanlan.zhihu.com/p/30669007
编辑于 2022-10-19 11:03