
前言#
配合vscode的调试,以下顺序其实能在调用堆栈内看到
如果你还不会调试,可以看下我的文章:如何在vscode里调试源码
入口:webpack/bin/webpack.js#
- 判断是否安装了
webpack-cli,有则直接执行runCli方法
/**
 * @typedef {Object} CliOption
 * @property {string} name display name
 * @property {string} package npm package name
 * @property {string} binName name of the executable file
 * @property {boolean} installed currently installed?
 * @property {string} url homepage
 */

/** @type {CliOption} */
const cli = {
	name: "webpack-cli",
	package: "webpack-cli",
	binName: "webpack-cli",
	installed: isInstalled("webpack-cli"),
	url: "https://github.com/webpack/webpack-cli"
};

if (!cli.installed) {
   ...省略
} else {
   runCli(cli);
}如果没有安装,则先是判断用什么命令行工具,然后帮你提示你安装webpack-cli,安装成功后再执行runCli
	let packageManager;
	if (fs.existsSync(path.resolve(process.cwd(), "yarn.lock"))) {
		packageManager = "yarn";
	} else if (fs.existsSync(path.resolve(process.cwd(), "pnpm-lock.yaml"))) {
		packageManager = "pnpm";
	} else {
		packageManager = "npm";
	}
	const installOptions = [packageManager === "yarn" ? "add" : "install", "-D"];

             ...省略命令行界面提示安装相关代码
		runCommand(packageManager, installOptions.concat(cli.package))
			.then(() => {
				runCli(cli);
			})
			.catch(error => {
				console.error(error);
				process.exitCode = 1;
			});
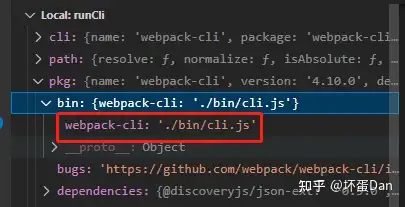
});runCli方法用来找到webpack-cli/bin/cli.js文件
const runCli = cli => {
	const path = require("path");
	const pkgPath = require.resolve(`${cli.package}/package.json`);
	// eslint-disable-next-line node/no-missing-require
	const pkg = require(pkgPath);
	// eslint-disable-next-line node/no-missing-require
	require(path.resolve(path.dirname(pkgPath), pkg.bin[cli.binName]));
};
require文件
进入weback-cli/bin/cli.js文件中#
如果!process.env.WEBPACK_CLI_SKIP_IMPORT_LOCAL,则判断是否当前文件夹是否是本地node_modules里的。不是则return。这里的WEBPACK_CLI_SKIP_IMPORT_LOCAL待确认作用,看名字意思是跳过导入本地?
代码很少,直接贴出来
"use strict";

const importLocal = require("import-local");
const runCLI = require("../lib/bootstrap");

if (!process.env.WEBPACK_CLI_SKIP_IMPORT_LOCAL) {
  // Prefer the local installation of `webpack-cli`
  if (importLocal(__filename)) {
    return;
  }
}

process.title = "webpack";

runCLI(process.argv);跟着上面提到的进入../bootstrap.js文件里#
先是new 一个webpack-cli实例,然后执行实例的run方法,代码依旧很少,直接贴出来。
"use strict";
Object.defineProperty(exports, "__esModule", { value: true });
// eslint-disable-next-line @typescript-eslint/no-var-requires
const WebpackCLI = require("./webpack-cli");
const runCLI = async (args) => {
    // Create a new instance of the CLI object
    const cli = new WebpackCLI();
    try {
        await cli.run(args);
    }
    catch (error) {
        cli.logger.error(error);
        process.exit(2);
    }
};
module.exports = runCLI;其中webpack实例的构造过程, 说一下这个commander,这是一个第三方包,展示终端命令行选项, 链接:commander
const { program, Option } = require("commander");

class WebpackCLI {
    constructor() {
        this.colors = this.createColors();
        this.logger = this.getLogger();
        // Initialize program
        this.program = program;
        this.program.name("webpack");
        this.program.configureOutput({
            writeErr: this.logger.error,
            outputError: (str, write) => write(`Error: ${this.capitalizeFirstLetter(str.replace(/^error:/, "").trim())}`),
        });
    }
}
进入重点方法 cli.run方法#
这个方法很长,所以我们只看我们想要的
以下都是默认的打包流程,即:build
async run(args, parseOptions) {
  ...基于commander的一些终端选项以及不同命令需要的数据
  // 执行回调
  this.program.action(async (options, program) => {
    ...省略
  }
  await this.program.parseAsync(args, parseOptions);
}我们先看下build的args, parseOptions是undefined,因为前面压根没传
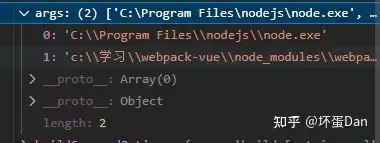
args
args`第二个参数没截图全,是`...\\node_modules\\webpack\\bin\\webpack.js可以看到args主要是传给了this.program.parseAsync方法,这个方法执行后触发action里的回调
来看下action里的回调代码,回调里也是一大段的代码根据不同参数执行不同命令,这里省略
this.program.action(async (options, program) => {
 ...省略
 // Command and options
 const { operands, unknown } = this.program.parseOptions(program.args);
 const defaultCommandToRun = getCommandName(buildCommandOptions.name);
 const hasOperand = typeof operands[0] !== "undefined";
 const operand = hasOperand ? operands[0] : defaultCommandToRun;
 ...省略
 let commandToRun = operand;
 let commandOperands = operands.slice(1);
 if (isKnownCommand(commandToRun)) {
   await loadCommandByName(commandToRun, true);
 } else {
  ...省略
 }
 ...省略
}
defaultCommandToRun 默认跑的命令参数,既是build
isKnownCommand方法用于判断是否是认识的参数
loadCommandByName方法#
          const loadCommandByName = async (commandName, allowToInstall = false) => {
            const isBuildCommandUsed = isCommand(commandName, buildCommandOptions);
            const isWatchCommandUsed = isCommand(commandName, watchCommandOptions);
            if (isBuildCommandUsed || isWatchCommandUsed) {
                await this.makeCommand(isBuildCommandUsed ? buildCommandOptions : watchCommandOptions, async () => {
                    this.webpack = await this.loadWebpack();
                    return isWatchCommandUsed
                        ? this.getBuiltInOptions().filter((option) => option.name !== "watch")
                        : this.getBuiltInOptions();
                }, async (entries, options) => {
                    if (entries.length > 0) {
                        options.entry = [...entries, ...(options.entry || [])];
                    }
                    await this.runWebpack(options, isWatchCommandUsed);
                });
            }
            ...省略
} 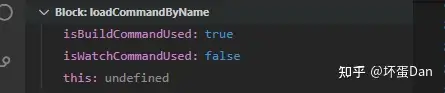
命令
然后可以看到执行了this.makeCommand方法
makeCommand方法#
    async makeCommand(commandOptions, options, action) {
        ...省略
        const command = this.program.command(commandOptions.name, {
            noHelp: commandOptions.noHelp,
            hidden: commandOptions.hidden,
            isDefault: commandOptions.isDefault,
        });
        ...省略,一堆赋值给command
        if (options) {
            if (typeof options === "function") {
                if (forHelp && !allDependenciesInstalled && commandOptions.dependencies) {
                    command.description(`${commandOptions.description} To see all available options you need to install ${commandOptions.dependencies
                        .map((dependency) => `'${dependency}'`)
                        .join(", ")}.`);
                    options = [];
                }
                else {
                    options = await options();
                }
            }
            options.forEach((optionForCommand) => {
                this.makeOption(command, optionForCommand);
            });
        }
        command.action(action);
        return command;
} 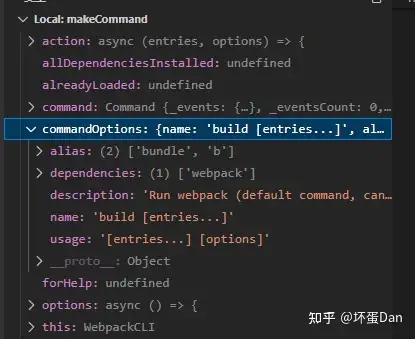
数据
这里先是拿到build的command实例,然后options = await options() 这里就是上面提到的第二个参数,这里导入了webpack并赋值给this.webpack,这里留到分析webpack的执行顺序时再分析。
                async () => {
                    this.webpack = await this.loadWebpack();
                    return isWatchCommandUsed
                        ? this.getBuiltInOptions().filter((option) => option.name !== "watch")
                        : this.getBuiltInOptions();
}随后options被通过this.makeOption方法合并到command上,这里先不分析,来看下拿到的options是什么。
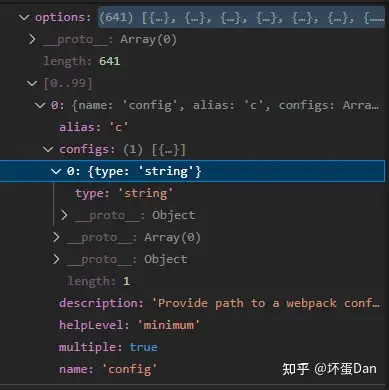
options
看着很奇怪,先跳过,后面再分析。
然后执行了第三个参数action回调
               async (entries, options) => {
                    if (entries.length > 0) {
                        options.entry = [...entries, ...(options.entry || [])];
                    }
                    await this.runWebpack(options, isWatchCommandUsed);
} 合并entry,然后执行this.runWebpack
runWebpack方法#
async runWebpack(options, isWatchCommand) {
  let compiler;
  ...省略
  compiler = await this.createCompiler(options, callback);
  if (!compiler) {
    return;
  }
  ...省略
} 这个方法省略其它,主要就是执行了createCompiler方法
createCompiler方法#
    async createCompiler(options, callback) {
        ...省略
        let config = await this.loadConfig(options);
        config = await this.buildConfig(config, options);
        let compiler;
        try {
            compiler = this.webpack(config.options, callback
                ? (error, stats) => {
                    if (error && this.isValidationError(error)) {
                        this.logger.error(error.message);
                        process.exit(2);
                    }
                    callback(error, stats);
                }
                : callback);
            // @ts-expect-error error type assertion
        }
        ...省略
        return compiler;
} 这个方法顾名思义就是创建compiler实例然后返回
其中loadConfig以及buildConfig 获取本地配置文件(webpack.config.xx)的配置,然后作为生成compiler的参数
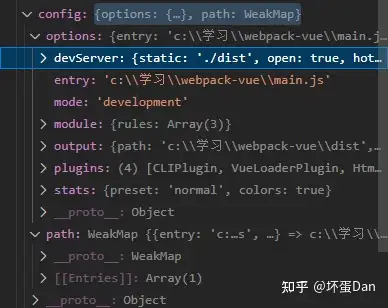
config
可以看到这就是我们熟悉的配置文件的字段。
整个流程基本就完成了,至于创建compiler中间发生了什么,留到下篇文章分析。
总结#
作用是判断是否安装完所需插件,获取命令行参数,然后分析参数调用不同方法,这个过程中如何去处理loader、plugins等都交给了webpack。脚手架帮忙初始化webpack实例和生成compiler。
然后整个流程基本就结束了,后面再分析webpack
编辑于 2022-08-25 17:26